CRT Memory Interface Guide
Turn a Portrait Into a 1980s CRT Graphics Interface
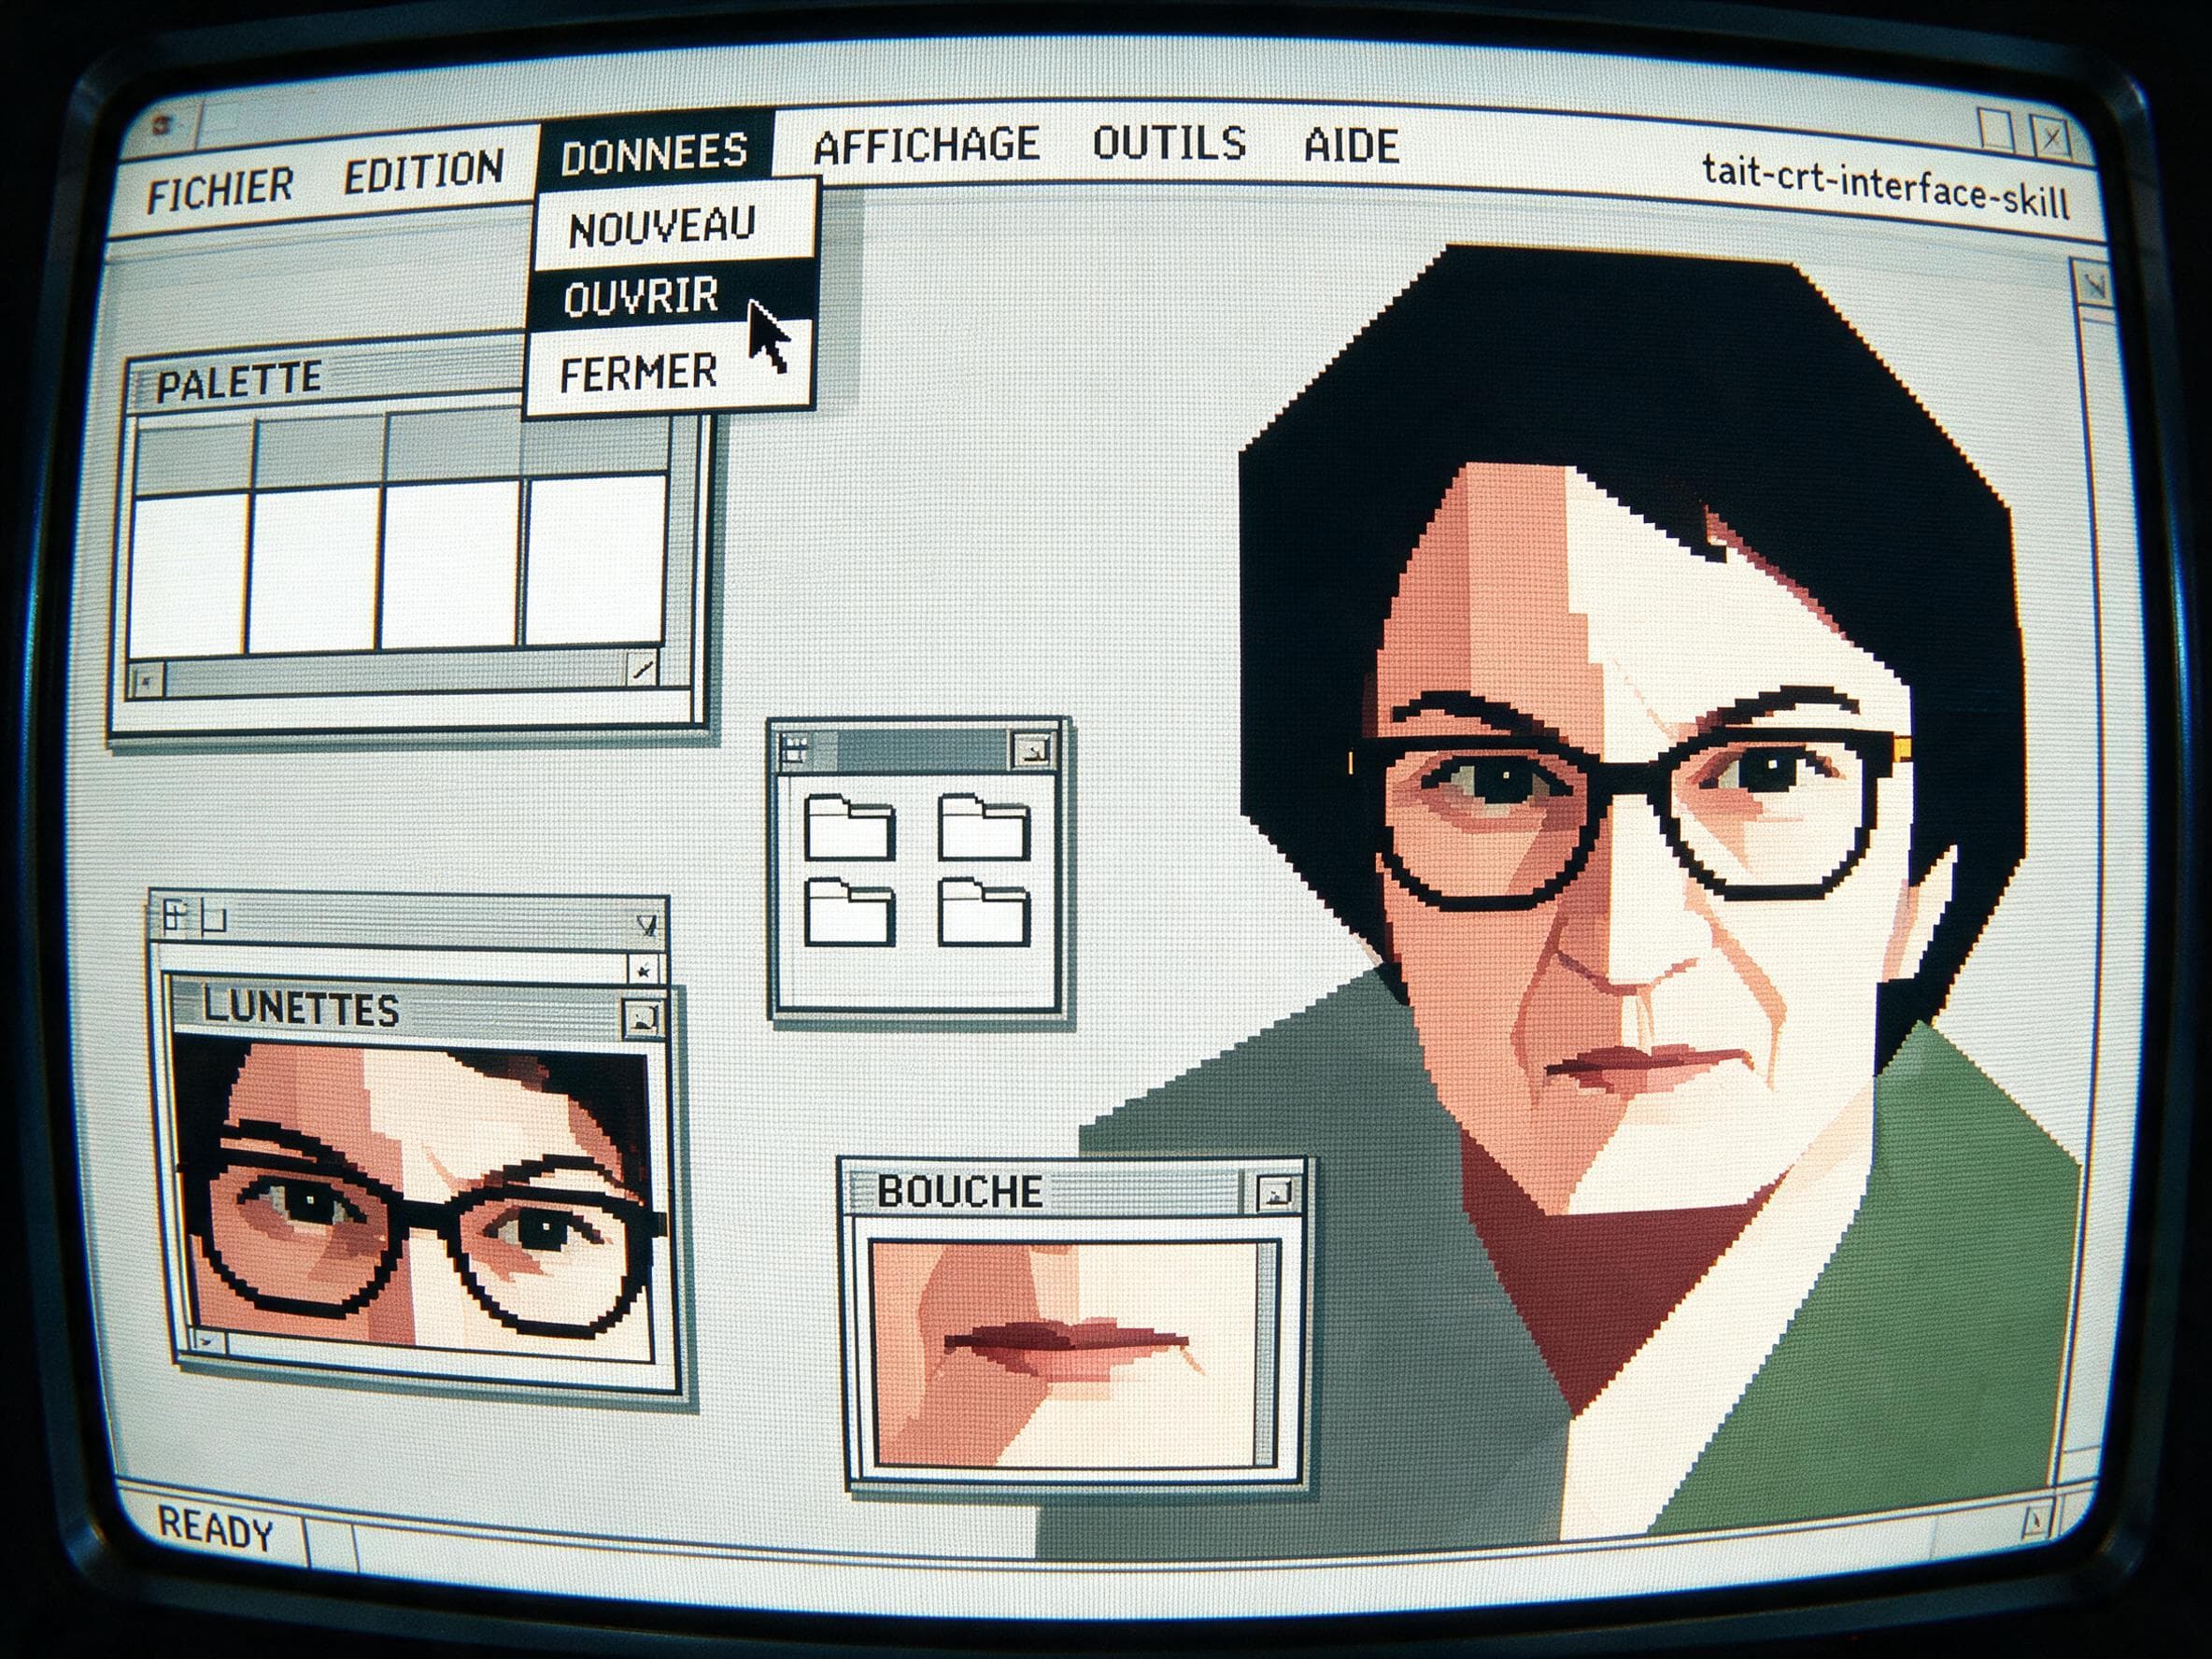
The reviewed result is more than a scanline overlay: it shows one portrait as a low-resolution 1980s-style GUI with window panes, curved CRT framing, and generated lettering that requires review.
Quick Answer
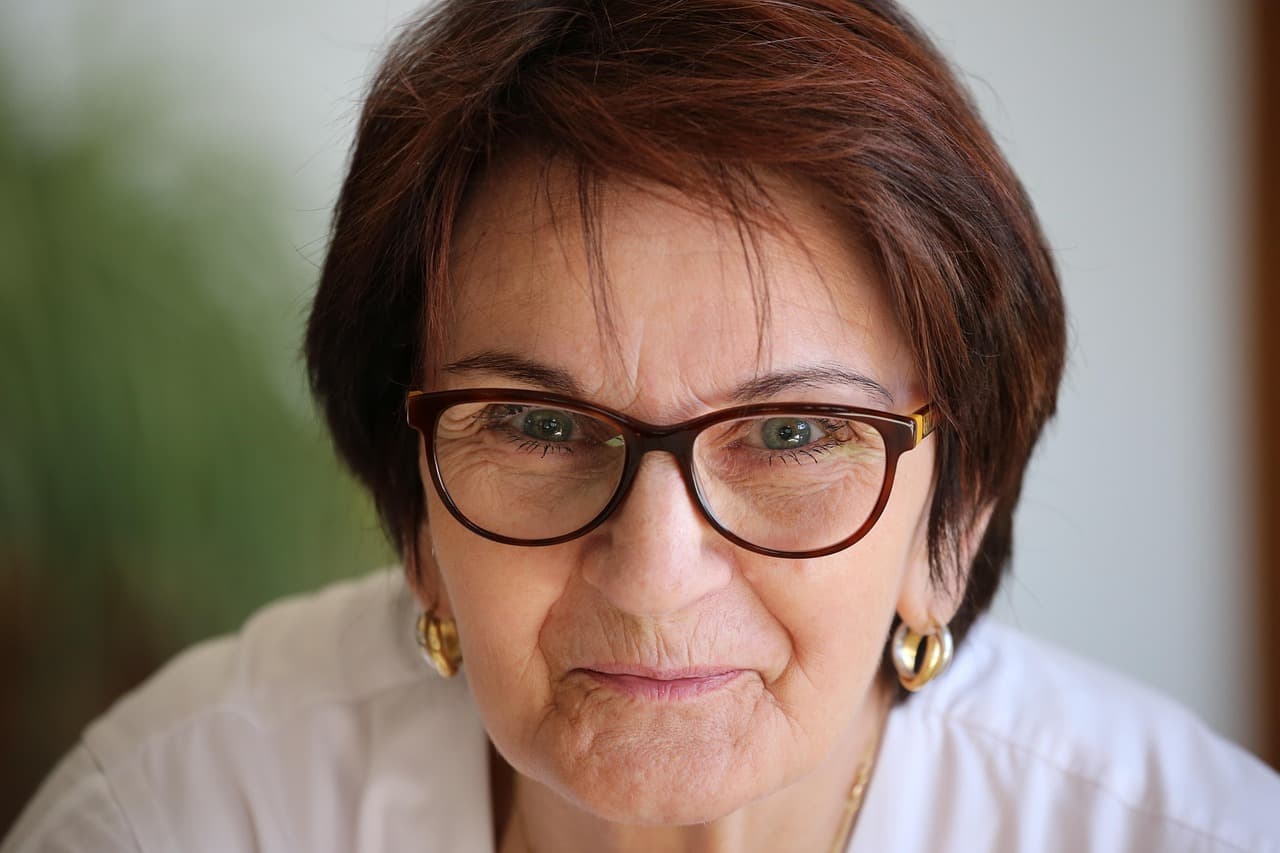
In the reviewed pair, a close portrait becomes a low-resolution CRT graphics composition rather than a simple scanline overlay. The result places facial regions in several panes and adds generated menu text that must be checked. The source shows an older woman with short brown hair, dark rounded glasses, hoop earrings, a white top, and a direct gaze.
Real Before-and-After Evidence
The source image is a close portrait of an older woman with short brown hair, dark rounded glasses, hoop earrings, a white top, and a direct, steady gaze. The resulting output does not just layer scanlines over the original photo. Instead, it places a low-resolution reconstruction of the same short hair, glasses, eyes, mouth, earrings, and white collar inside one large central pane, plus smaller separate windows that isolate the eye and mouth areas. The entire composition is framed by a curved CRT screen edge, gray window chrome, and generated French-looking menu labels and filename-style text that do not appear anywhere in the original source photo. Some fine facial detail from the original is softened by the low-resolution reconstruction, and the generated lettering may not match any real-world label or phrase.
Step-by-Step Workflow
- 01
Open the CRT Memory Interface Skill
Open the public CRT Memory Interface Skill at /skills/crt-memory-interface and inspect the published portrait/result pair. Note the curved screen, main portrait window, smaller eye and mouth panes, and generated lettering before testing your own image.
- 02
Upload your source portrait and run the Skill
Provide a clear close portrait that you have the right to use and run the transformation. When the result appears, compare the hair, glasses, earrings, eyes, mouth, facial proportions, window layout, and all generated lettering with the source and your intended use.
- 03
Review, adjust if needed, and save to your Library
Compare the generated output side by side with your original photo. Check that the facial elements you wanted to carry through are represented acceptably, and inspect all generated text and interface labels for accuracy. When you are satisfied with the result, save it to your signed-in Imagild Library for access during the platform's stated retention period.
Key Decisions Before You Start
- Choose which core portrait features matter most to you
- Decide upfront if you want the final output to prioritize the subject's glasses, hair shape, earrings, or general facial expression. The low-resolution reconstruction will not preserve every fine pixel from the source, so picking a small set of key features to check will help you evaluate whether a given result is a good match for your creative goal.
- Accept that generated interface elements will not match your source
- Understand that the Skill generates menu labels, window chrome, and filename-style text as visual retro content, not as a factual transcription of anything from your original photo. If you need specific readable text, you will need to plan to edit or replace those elements after generation, rather than expecting them to appear exactly as you typed them.
- Allocate time for a full manual review before public use
- Set aside extra time to inspect the full output before you share it publicly or use it for a sensitive project. Check facial proportions, the readability of any generated lettering, and the overall tone of the CRT effect. If the first result does not meet your needs, you can run the Skill again with the same source photo to produce a new variation to compare.
Official sources checked
Frequently Asked Questions
Is this just a scanline filter that overlays effects on my original photo?
No. Unlike a simple scanline overlay, this Skill reconstructs your portrait into a new low-resolution GUI composition with multiple window panes and a curved CRT screen frame. The original photo is not kept intact under a static effect layer, so the final image is a full generative reinterpretation rather than a filtered copy.
Why do the generated menu labels look like French text if my source photo has no text at all?
The French-looking menu labels are part of the Skill's retro terminal visual style, and they are generated as decorative content. They are not pulled from your source image, and they may not form coherent, correctly spelled phrases. You should always read through all generated text carefully and edit or replace it if you need accurate, intentional wording in your final piece.
Can I use this Skill for any portrait, or are there best practices for my source photo?
A well-lit close portrait where the face is clearly visible and facing toward the camera will generally produce the most recognizable CRT reconstruction. Very distant shots, heavily obscured faces, or extremely blurry source photos may produce results that are harder to match to the original subject. You can test a source image directly in the Skill to see if the output fits your creative vision.