Editorial candid portrait workflow
Turn a portrait into an airport editorial candid photo
A candid-looking frame depends on movement, light, viewpoint, and what the camera leaves partially unseen. This guide uses one reviewed Imagild source-and-result pair to show what changed, what remained readable, and what still needs a human check.
Quick answer
To turn a posed portrait into an airport editorial candid photo, start with one clearly visible adult subject and a readable outfit, use Airport Fan-Site Editorial, then compare the result with the source. Check the face, hands, coat, bag, body proportions, terminal structure, light direction, and any foreground obstruction before saving or sharing it.
What the reviewed before-and-after pair actually shows
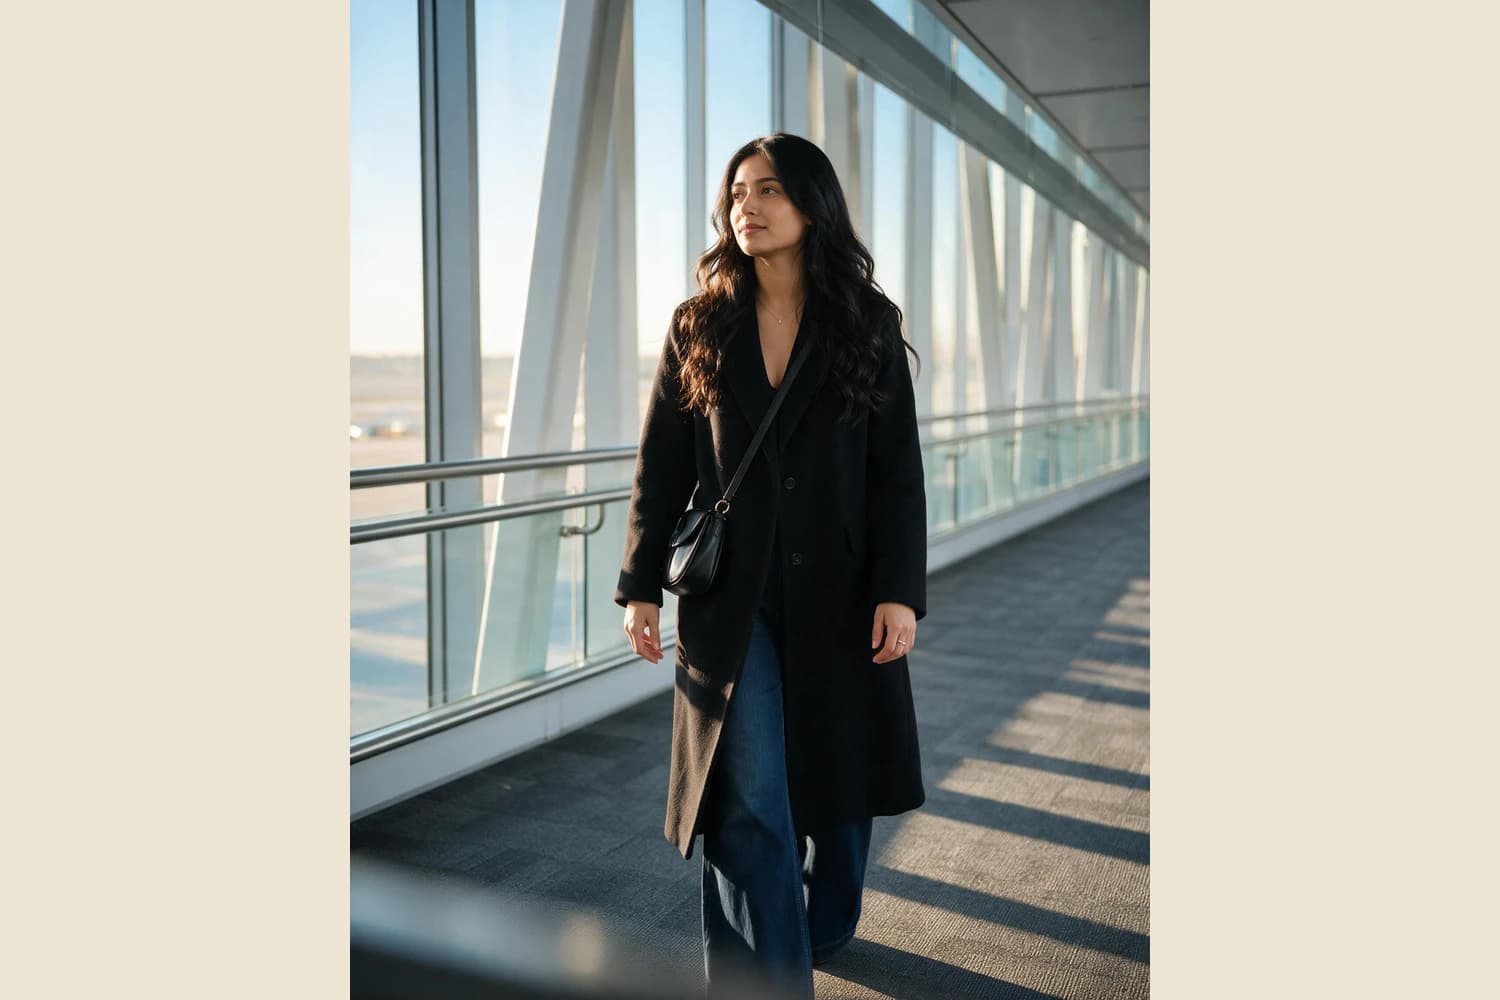
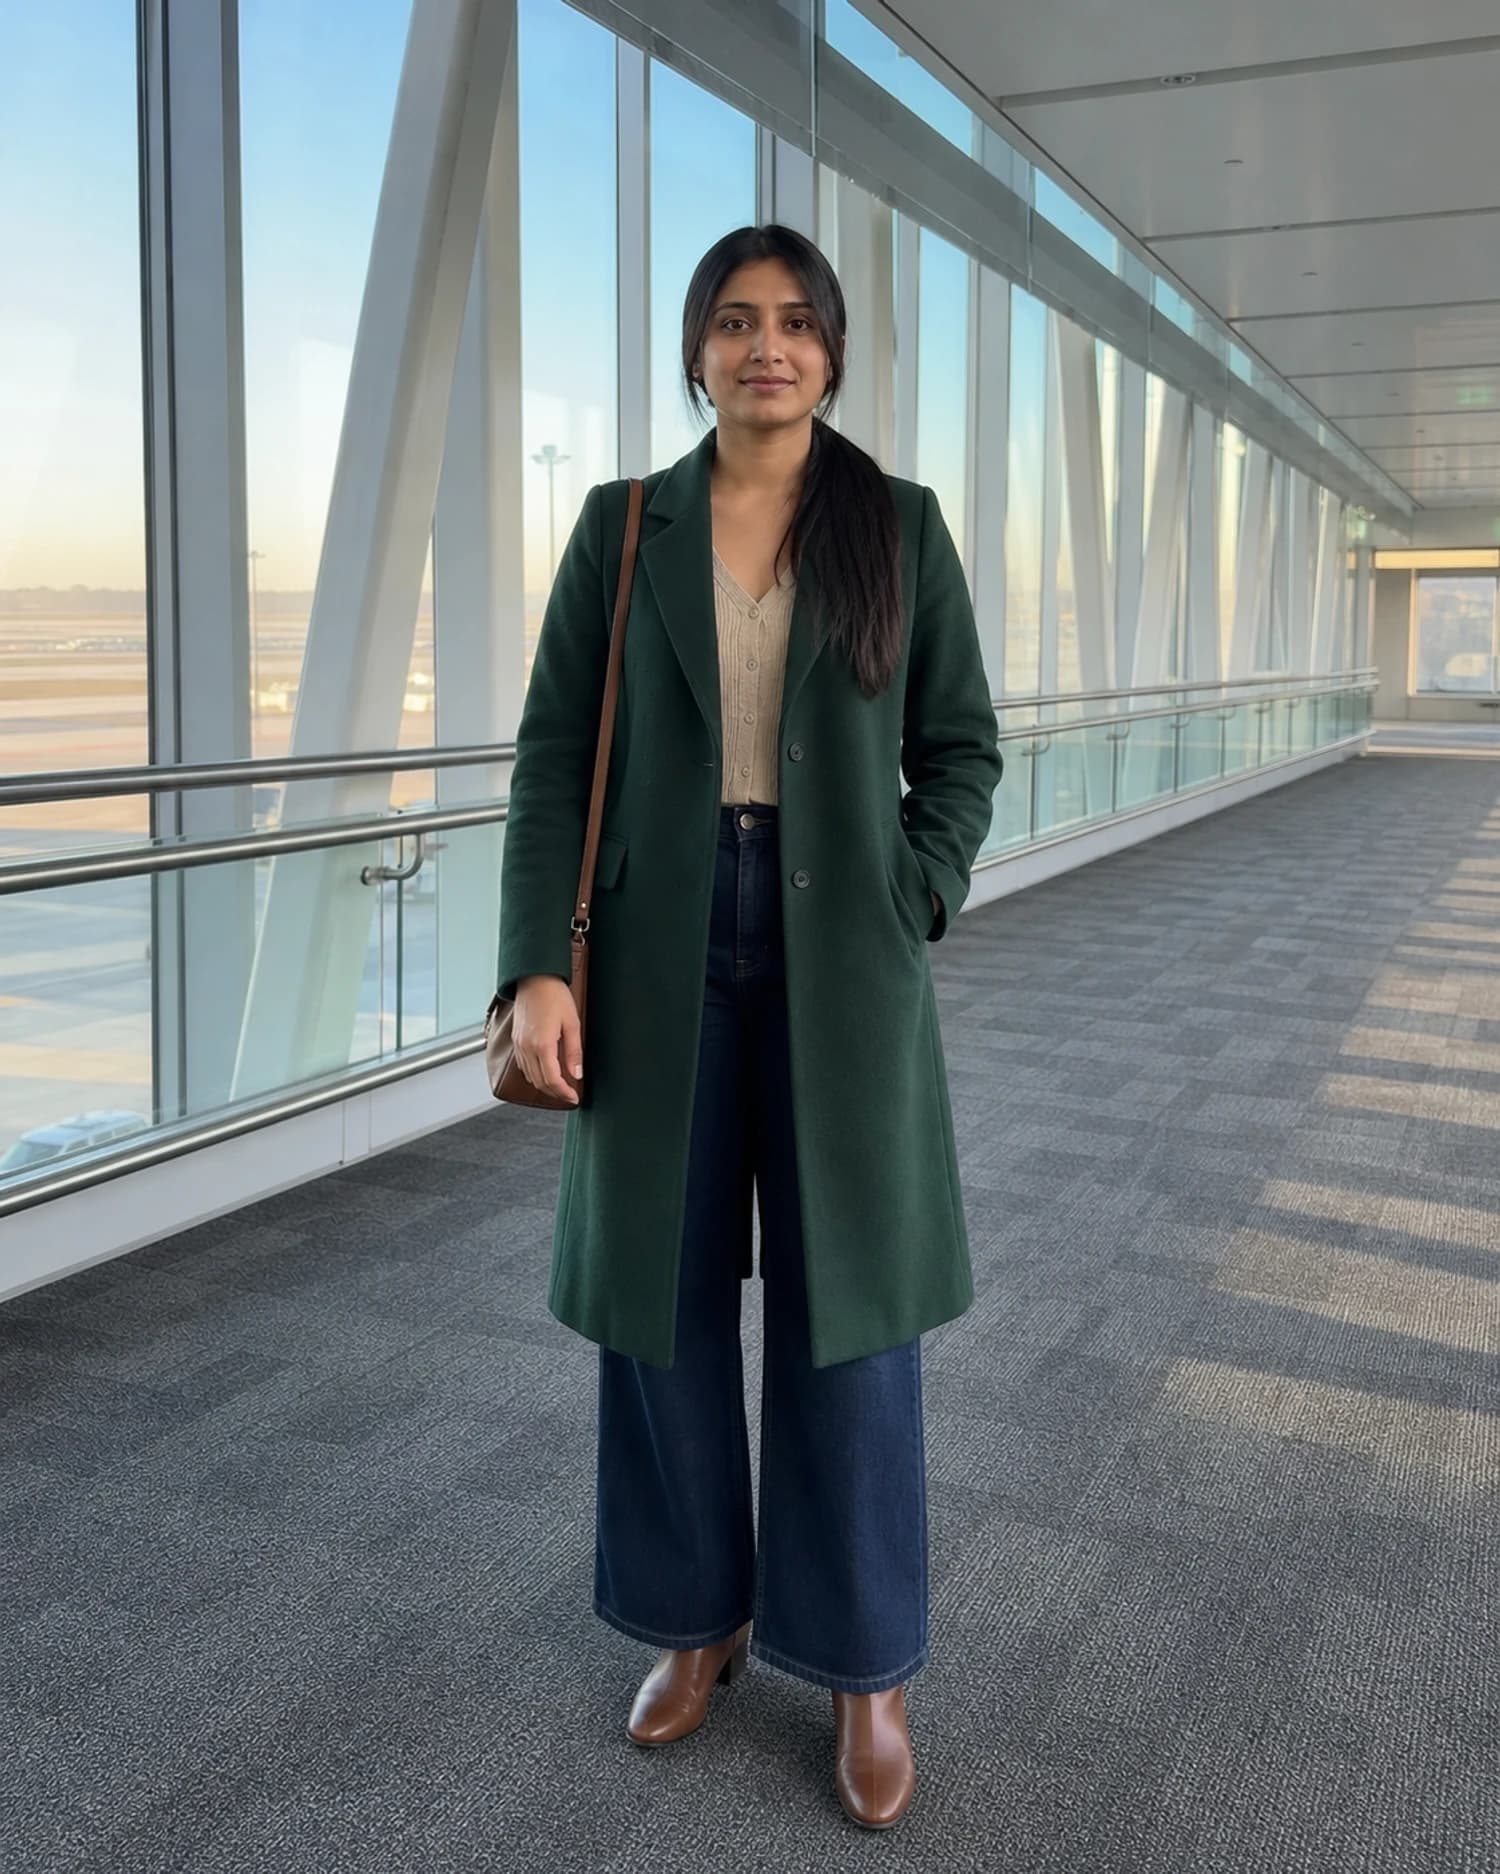
The source is a front-facing, full-body terminal portrait beside a long glazed wall. The subject wears a green coat, wide-leg jeans, brown shoes, and a shoulder bag. In the result, one adult subject remains in the same kind of terminal corridor, but the composition becomes a walking three-quarter view. The coat turns dark, the bag crosses the torso, the face looks away from the camera, sunlight catches the hair, and long shadows cross the floor. A soft dark shape at the lower edge makes the viewpoint feel partially obstructed. These are observations from this pair, not fixed outcomes for every upload.
A three-step airport editorial workflow
- 01
Choose a source that can survive reframing
Use a lawful, consented photo of an adult where the face, hair, hands, clothing layers, footwear, and carried items can be inspected. A clean view makes later comparison possible. Note the features that matter to the person and the outfit before starting; do not rely on memory after the scene has changed.
- 02
Run the transformation with restrained direction
Open Airport Fan-Site Editorial and provide the source. If you add optional wording, keep it factual and limited to an outfit, accessory, location, or action you are entitled to depict. Avoid celebrity names, invented endorsements, or claims that the generated setting records a real arrival. The output is a creative reconstruction, not documentary evidence.
- 03
Review source and result side by side
Compare facial proportions, gaze, hairline, fingers, jewelry, bag straps, coat openings, trouser shape, and shoes. Then inspect the terminal rails, window frames, floor lines, shadows, and the lower-edge obstruction. Reject a result when a hand, accessory, architectural line, or relationship between objects no longer makes visual sense.
What to preserve, allow, and reject
- Preserve the person and wardrobe relationships
- The source and result still share one adult subject, a long coat, wide-leg jeans, and a bag, but the turned face does not provide enough evidence to confirm identity continuity. Treat those as comparable person-and-wardrobe relationships, not proof of the same person. Pay special attention to the face, hands, hair, bag position, and the way garments overlap.
- Allow the composition to become less posed
- A sideward gaze, walking posture, longer-feeling viewpoint, directional sunlight, shallow-looking background, and partial obstruction can create editorial energy. These changes are useful only when they form one coherent moment. More motion cues do not automatically make a stronger picture.
- Reject false documentary meaning
- Do not describe the result as a real airport sighting, news photograph, fan photograph of a public figure, or proof that an event occurred. Use only images you may transform, disclose material AI alteration when context requires it, and never use the output for identity verification, reporting, or deception.
Official sources checked
Questions about airport editorial portraits
Does the Skill guarantee the same face and outfit?
No. The source supplies a person and wardrobe reference, but a generative result can change facial detail, hair, clothing color, accessories, hands, or proportions. Because the reviewed result turns the face away, this pair cannot establish exact identity continuity. Treat side-by-side inspection as a required editorial step.
Is the result a real long-lens airport photograph?
No. It is a raster image generated from a source portrait. The walking frame, directional light, apparent depth, and foreground obstruction create a long-lens editorial impression, but they do not prove a particular lens, camera, location, date, or real-world event.
Can I transform a photo of another person?
Only when you have a lawful basis and appropriate permission. Do not use the workflow for impersonation, harassment, false endorsement, deceptive reporting, or high-impact claims. If the subject is identifiable, consider how and where the altered image will be shown before generating it.