Integrated Identity Mark Guide
Turn a Landmark Photo Into an Integrated Wordmark Concept Draft
This step-by-step walkthrough shows how a full coastal lighthouse photograph becomes a compact, thematically linked word-and-symbol concept that stays clearly marked as a non-final design draft, so you never mistake a generative concept for a production-ready logo asset.
At a Glance
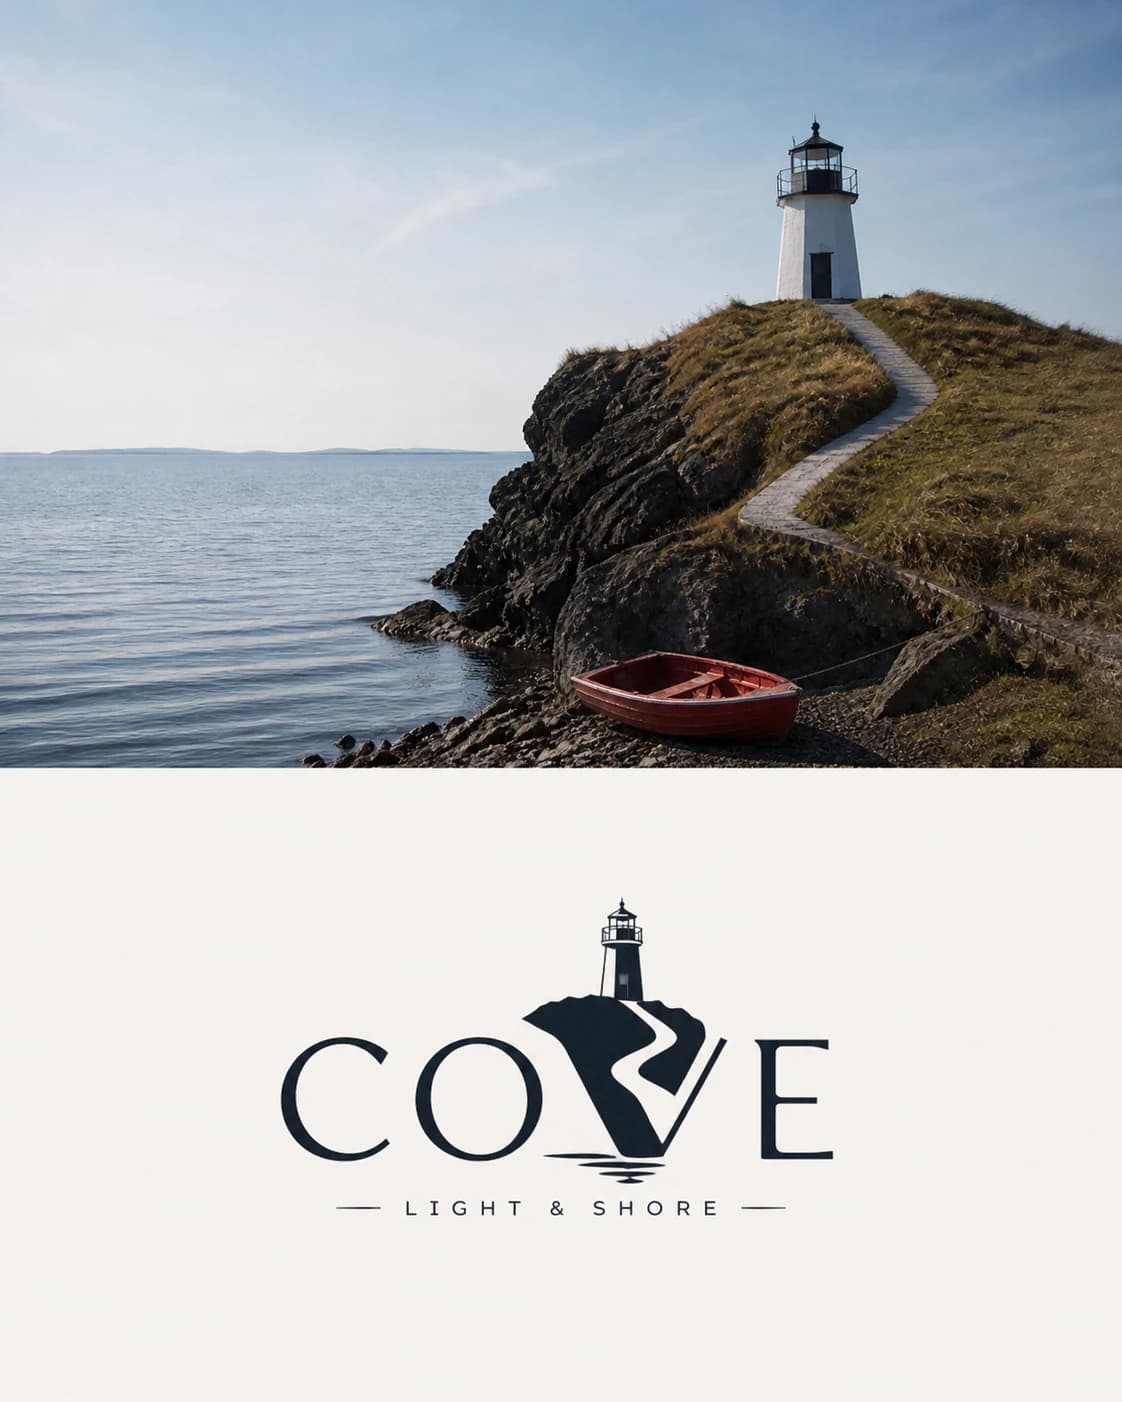
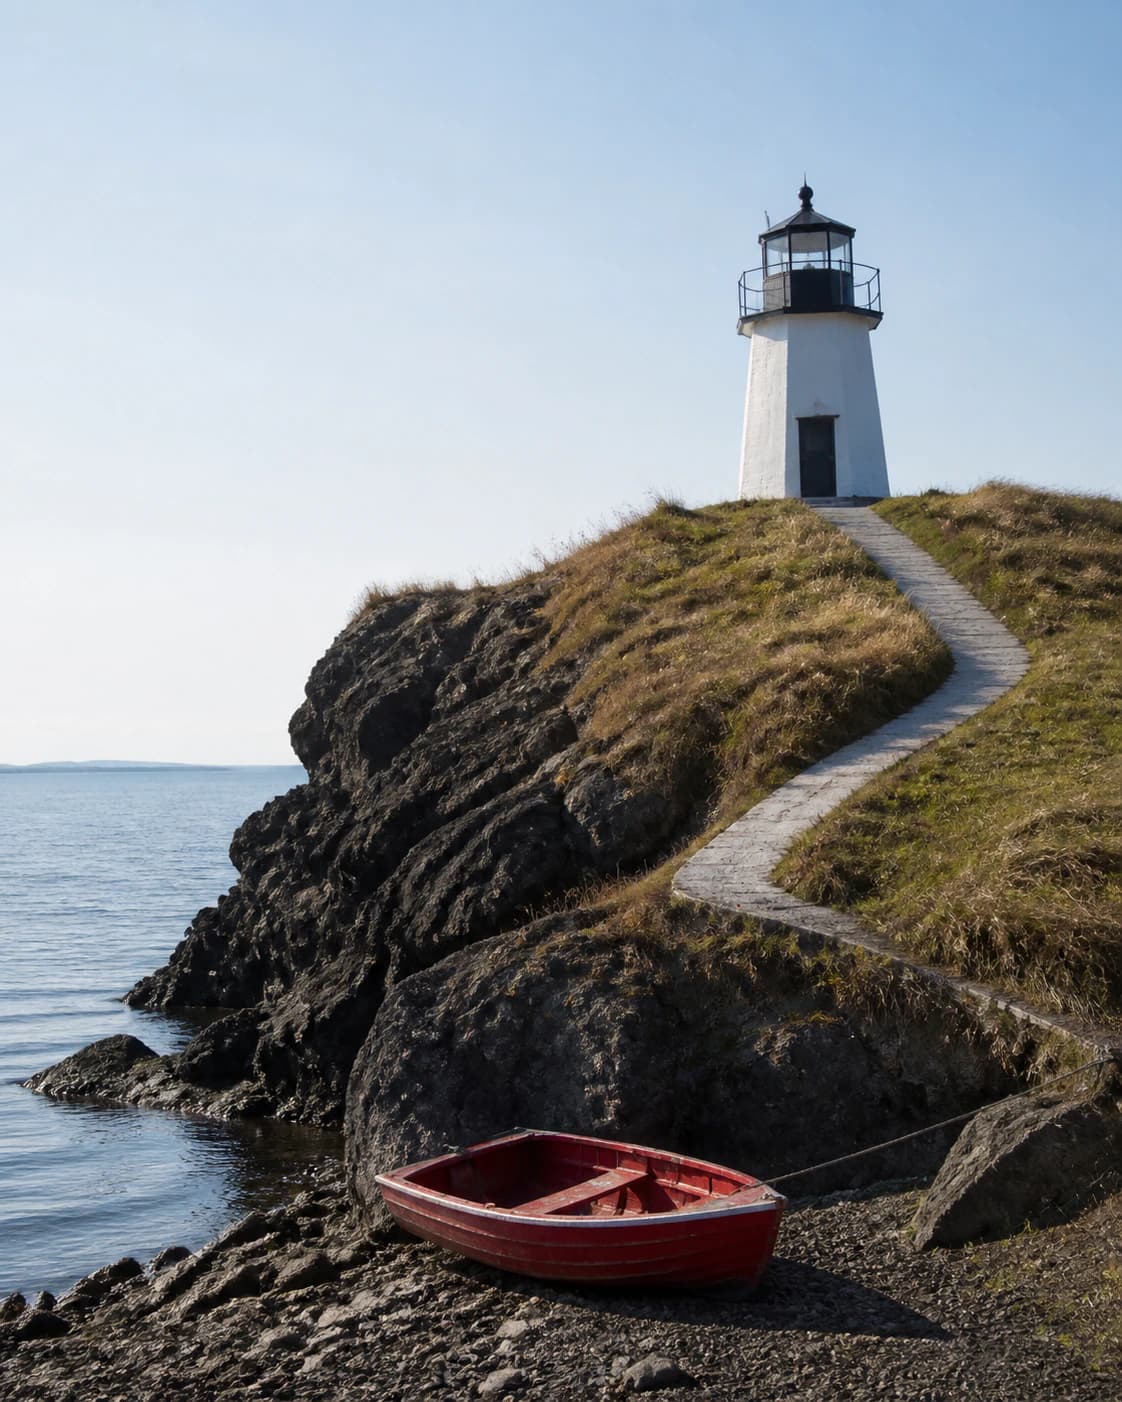
This guide walks you through using the Integrated Identity Mark Skill to turn your landmark photo into a labeled wordmark concept, with clear context on what the output includes and what it is not designed to deliver. In the reviewed before-and-after pair, the source shows a white lighthouse on a rocky coastal headland, a red boat on blue water, and a pale path curving through the cliff landscape.
Real Before-and-After Sample
The source image shows a white lighthouse perched on a rocky coastal headland, a small red boat floating on bright blue water, and a pale walking path curving gently through the cliff landscape. The reviewed result keeps the full original source photograph visible in the upper portion of the canvas, then reinterprets the lighthouse silhouette, cliff contour, shoreline curve, and winding path to form the integrated visual structure of the lower 'COVE' wordmark, paired with the smaller subtitle 'LIGHT & SHORE'. No extra unrelated objects or colors are added to the lower mark, and the connection between the original landscape elements and the new word shape is immediately recognizable.
Step-by-Step Workflow
- 01
Open the Integrated Identity Mark Skill
Navigate directly to the public Skill at /skills/integrated-identity-mark from the Imagild homepage, or locate it through the Studio Skill browser. Confirm you are signed in to your Imagild account so your completed output will save to your personal Library once the transformation finishes. You do not need to adjust any hidden settings or install extra software to run this published Skill.
- 02
Upload your landmark source photograph
Select a clear, well-lit photo of your chosen landmark that includes the key visual elements you want referenced in your wordmark concept, such as a distinct building silhouette, natural curve, or recognizable foreground path. For this sample, the coastal lighthouse photo was selected specifically because the lighthouse, cliff, shoreline, and path all offered strong, simple shapes that could map directly to letterforms. Avoid heavily cropped or overexposed source files that obscure the core features you want to carry through to the concept.
- 03
Run the transformation and review your output
Start the Skill and wait for the single generated result to appear on screen. Compare it side by side with your original photo to confirm the landmark elements you prioritized are referenced in the new wordmark structure. The output will be a single raster image that keeps your full source photo visible above the new mark, so the entire page reads as a transparent, clearly labeled design draft. Save the accepted result to your Library when you are satisfied with the concept direction.
Key Pre-Use Decisions
- Choose which landmark elements to prioritize for preservation
- Before you upload your photo, decide which 2 to 4 core visual details are non-negotiable for your concept. For the coastal sample, the creator prioritized the lighthouse shape, cliff contour, shoreline curve, and walking path to ensure every letter of the COVE wordmark tied back to a specific part of the original scene. If you spread your focus across too many small, complex details, the final mark may feel cluttered and lose the clear visual link to your source landmark.
- Accept that generated concept text may not match your exact intended wording
- The Integrated Identity Mark Skill generates its own concept copy for the wordmark and subtitle, rather than pulling custom text directly from your input. In the published sample, the system produced 'COVE' and 'LIGHT & SHORE' as thematically appropriate copy, but your output may use different wording that reflects the content of your source photo. Always read the generated lettering carefully after the run, and note that you may need to refine the text manually later if you have a specific brand name in mind.
- Verify that your output is a concept draft, not a final production asset
- The generated raster result is a creative concept piece, not an editable vector master, responsive logo family, trademark search report, or legal clearance document. Before you invest in professional trademark filing, visit the official USPTO trademark basics guidance at https://www.uspto.gov/trademarks/basics to learn about standard-character and special-form mark drawing requirements, and conduct a full independent trademark search to confirm your chosen mark does not conflict with existing registered assets.
Official sources checked
Frequently Asked Questions
Can I use this Skill to create a final, ready-to-file trademark logo for my small business?
No. The output is a raster concept art draft, not a production-ready vector logo system. It does not include a trademark search, legal clearance, or compliance with USPTO mark drawing standards. You can use the generated concept as a creative reference to share with a professional graphic designer or trademark attorney, who can then refine the idea into a formal, legally compliant asset suitable for registration.
What happens to my finished concept after I save it to my Imagild Library?
Your saved output remains in your Library for the product's stated retention period, and you can revisit it, download it, or delete it at any time while your account is active. You can export the file as a JPEG, PNG, or WebP at your chosen resolution from the Library export menu, with quality settings ranging from 60 to 100 to match your intended use case.
If I want to refine the colors or layout of my generated wordmark draft, can I edit it further in the Imagild photo workbench?
Yes, you can open your saved concept in the /editor workbench to make reversible adjustments. You can tweak exposure, contrast, saturation, warmth, and sharpness, apply a vignette or grain effect, use free crop to adjust the canvas size, or use the controlled AI object removal tool to clean up small unwanted artifacts. You can also use the local adjustment regions to modify the color of the wordmark separately from the original source photo above it.