Tutorial
Turn an Everyday Photo Into a Music Festival Poster With the Summer Sound Poster Skill
This step-by-step guide walks you through using the first-party Summer Sound Poster Skill, shows exactly what the reviewed sample preserves and what it generates, and explains why every event-related line of text needs full manual verification before you share or print your final concept.
Quick Answer
Open the Summer Sound Poster Skill, provide a source photo you have permission to use, run one generative transformation, and compare the raster result with the original. The reviewed sample keeps a radio and cactus visible, but it does not prove how another subject will appear. Treat every generated title, date, venue, admission claim, slogan, and footer as unverified layout copy.
Reviewed Before-and-After Evidence
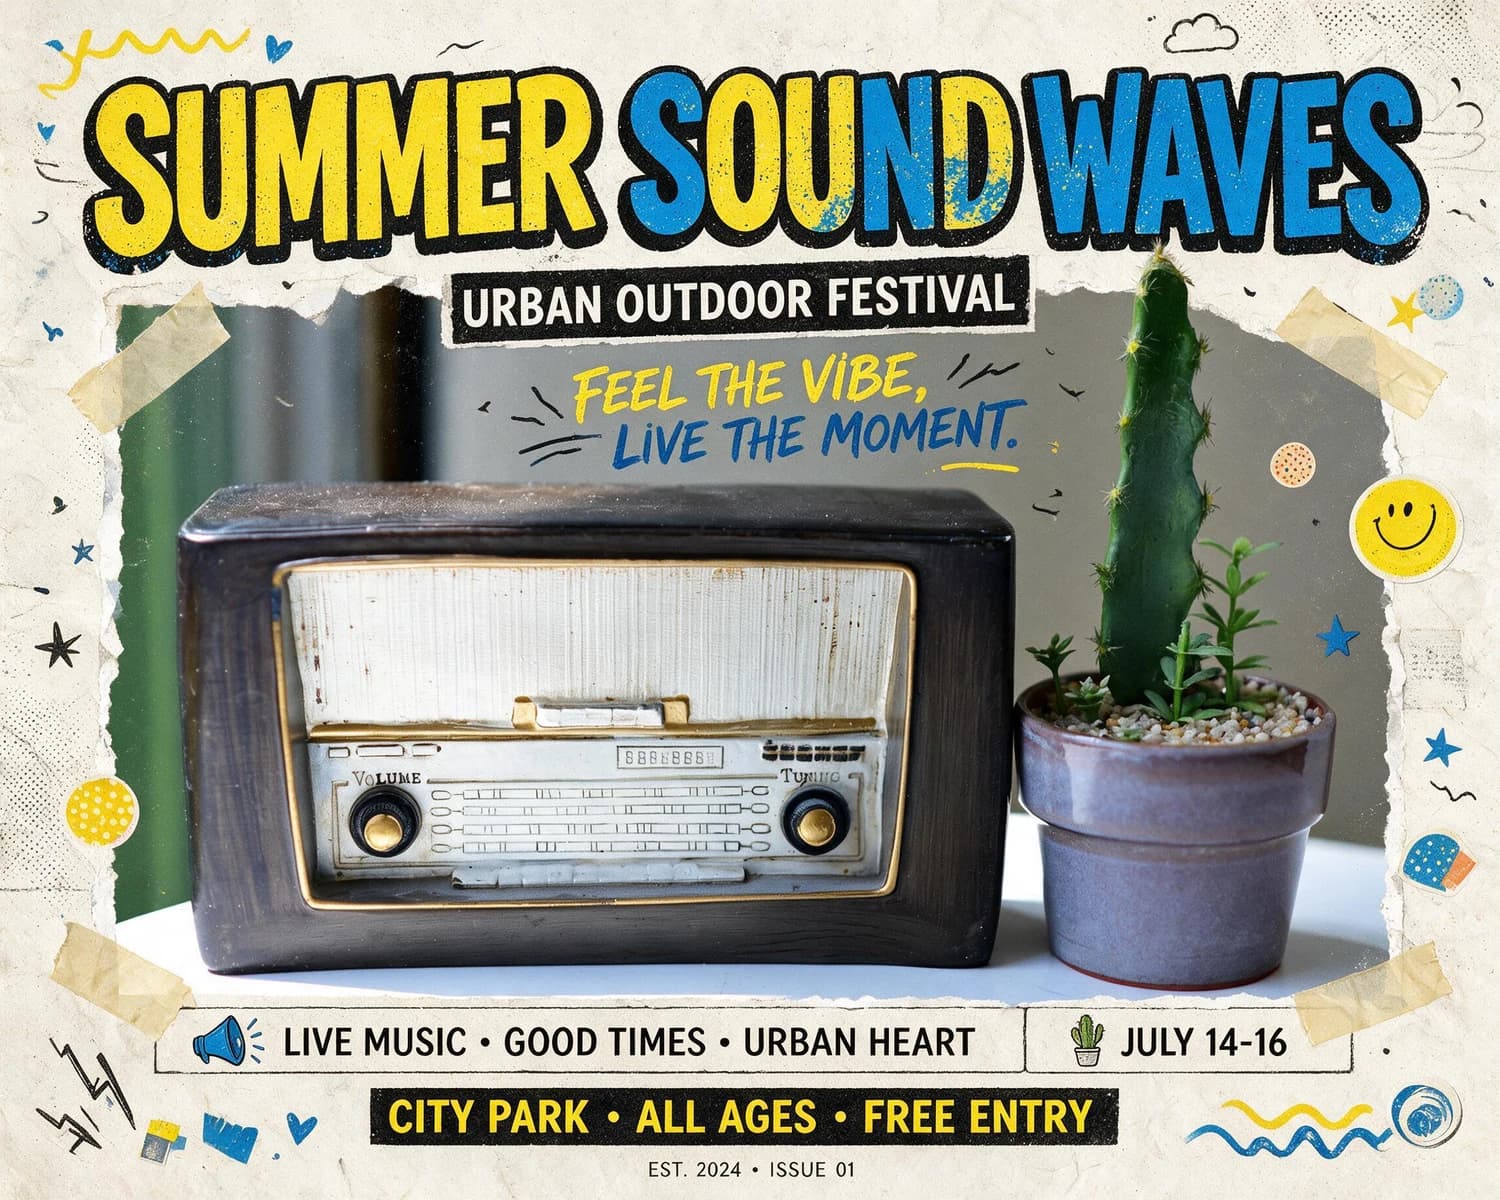
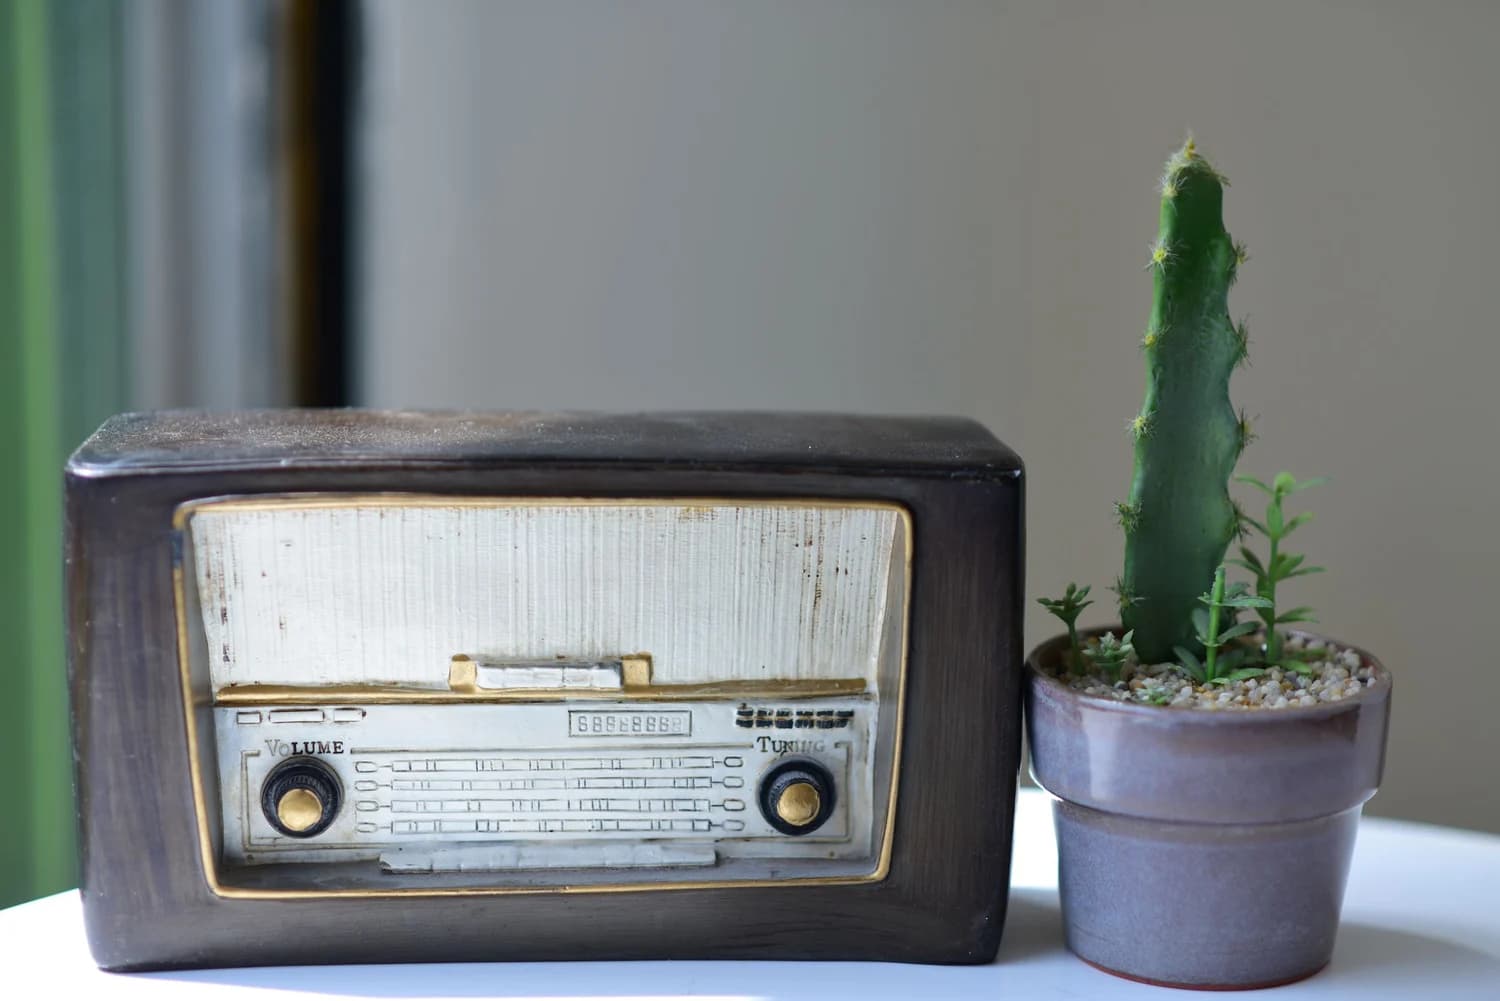
The original source is a horizontal still life shot of a dark vintage radio resting on a white surface, a potted cactus positioned to its right, a plain gray wall in the background, and a narrow green vertical strip along the far left edge. The reviewed square output keeps the full radio and cactus visible as the central photographic area, adds soft torn-paper edges around the perimeter, and layers in printed marks in blue, yellow, cream, and black. It also displays a large bold headline that reads SUMMER SOUND WAVES, plus additional generated lines that say URBAN OUTDOOR FESTIVAL, JULY 14-16, CITY PARK, and FREE ENTRY. None of those text elements existed in the original source photo.
Step-by-Step Workflow
- 01
Open the Summer Sound Poster Skill page
Navigate directly to the published Skill at /skills/summer-sound-poster from your web browser. You can review the public before-and-after sample pair on the landing page to confirm the general visual direction before you begin, no account required to browse the preview assets.
- 02
Upload your chosen source photograph
Provide a source photograph you have permission to use and run one generative transformation. The reviewed evidence covers only a radio-and-cactus still life, so note the subjects and boundaries you want to inspect in your own photo rather than assuming another object or scene will behave the same way.
- 03
Run the transformation and review your output
Start the generative transformation and wait for the process to complete. Once your result loads, compare it side by side with your original source photo. If you are satisfied with the output, save the raster concept to your signed-in Imagild Library, where it will be stored for the product's stated retention period.
Key Pre-Use Decisions
- Confirm which elements you want to keep visible in the final output
- Before you run the Skill, take a moment to identify the specific subjects in your source photo that you want to remain clear and unobscured. In the reviewed sample, the vintage radio and potted cactus stayed fully visible, but there is no guarantee that every element from your unique source photo will appear in the final output. Plan to compare the two images immediately after generation to confirm your preferred subjects are still present.
- Understand that all text and decorative marks are generated layout content
- The reviewed sample contains a headline, event label, dates, venue, admission line, slogan, and footer copy that are absent from the source photo. Those visible words are generated layout content, not verified event information. If text appears in your own result, check every character and claim against your approved event details before using it.
- Plan a full verification pass before you use the concept publicly
- The Texas State University School of Music and Indiana University Jacobs School of Music public event poster checklists recommend confirming every critical event detail for accuracy before publication. Since your output is a raster concept file and not a production-ready print document, you will need to manually check every word of generated text for typos, incorrect dates, misspelled venue names, or misleading admission claims before you share the poster online or send it to a printer.
Official sources checked
Frequently Asked Questions
What should I do with generated event text in the poster concept?
Treat it as unverified layout copy. Do not publish a title, date, venue, admission statement, slogan, or footer just because it appears plausible. Build a separate final layout with your approved event information, then proofread it against the source used by your organization before public release.
Will my source photo's specific subjects be preserved exactly the way the radio and cactus are in the sample?
There is no guarantee that every subject from your unique source photo will be preserved, centered, or unobscured in your final output. The reviewed sample only shows that the radio and cactus remained visible in that specific run. Always compare your generated result directly to your original photo immediately after the transformation finishes to confirm the subjects you cared about are still present and recognizable.
Is this generated poster concept ready to print and distribute as an official event notice?
No, the output you get from this Skill is a raster concept, not a verified event notice or a professional print-production file. All generated text is unvetted layout content, and you must cross-check every date, location, admission rule, and event name against your real event details. You should also review the independent event poster checklists from Texas State University School of Music and Indiana University Jacobs School of Music to make sure you have not missed any required factual fields before you publish.