Isometric Block Diptych
Turn an Architecture Photo Into an Isometric Block Miniature
This step-by-step guide walks you through converting a real architecture photograph into a stylized isometric block miniature, explains what the transformation preserves and what it does not, and clarifies that the final output is a 2D raster illusion, not a CAD file or editable 3D model.
Quick Answer
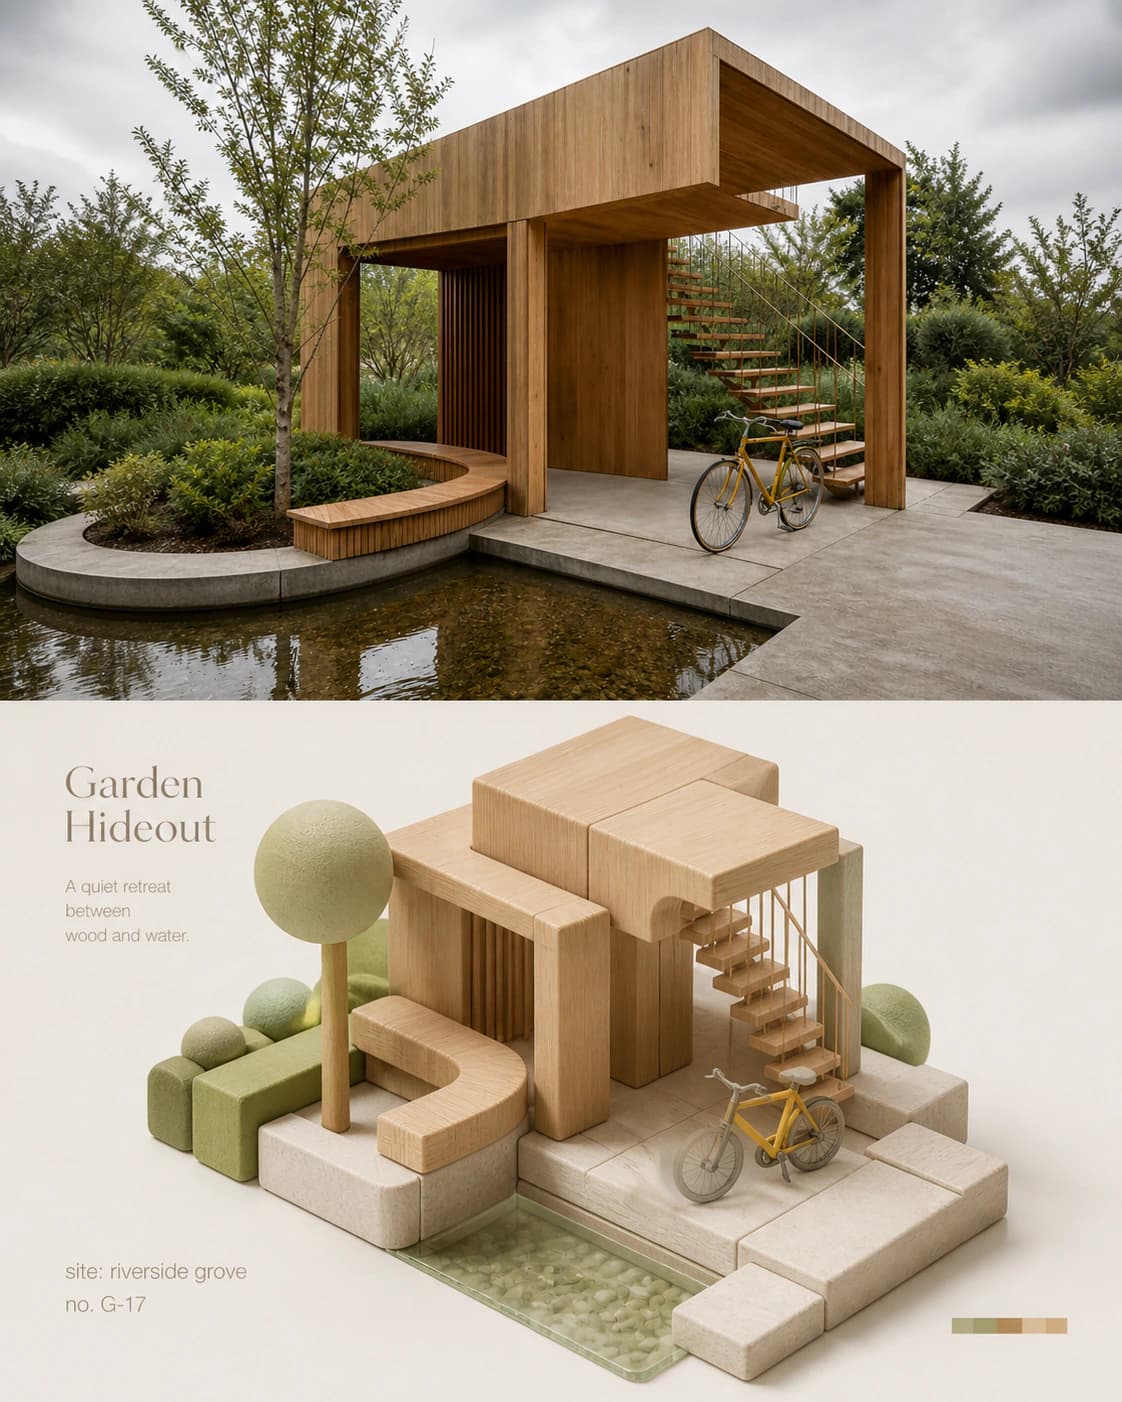
This guide shows you how to turn your architecture photo into an isometric block miniature using Imagild's dedicated Skill, while keeping core spatial relationships intact and understanding the limits of the 2D generated output. In the reviewed before-and-after pair, the source shows a modern timber garden pavilion with a strong roof plane, steps, a yellow bicycle, curved seating, water, paths, and planted edges.
Real Before-and-After Evidence
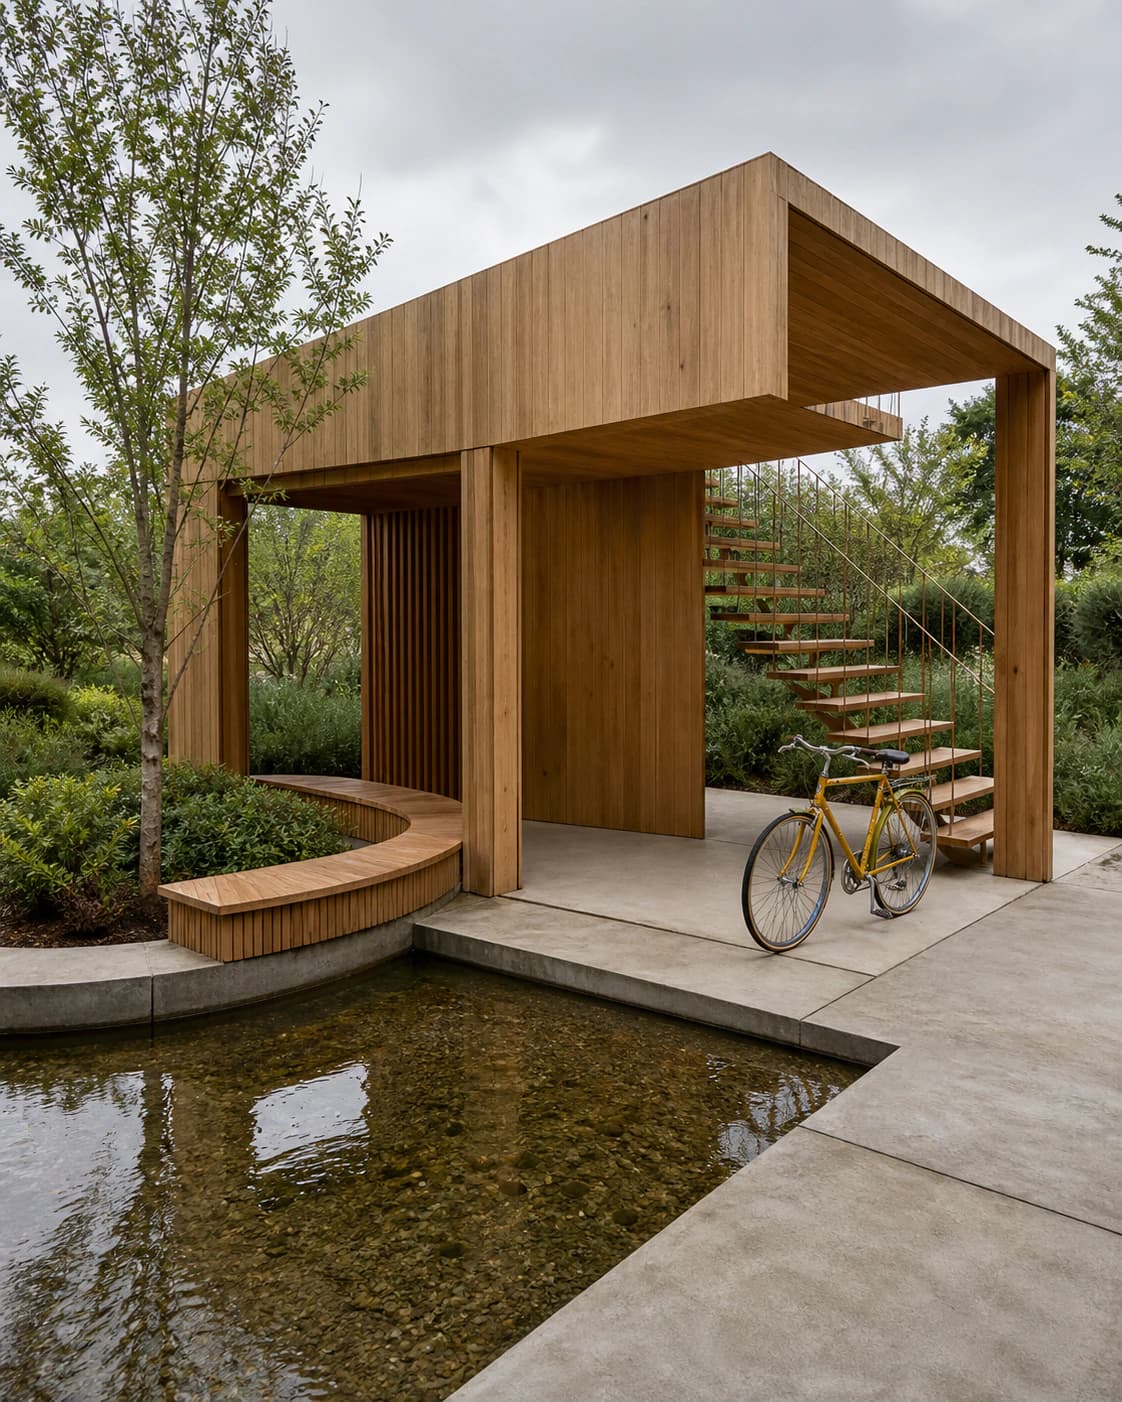
The original source image shows a modern timber garden pavilion with a prominent sloped roof plane, wide access steps, a bright yellow bicycle parked near the pavilion base, a smooth curved bench running along the water edge, a narrow strip of reflecting water, paved paths, and soft planted borders. The reviewed generated result keeps the pavilion as the clear dominant volume, retains the recognizable shape and placement of the bicycle, the simplified block form of the stairs, the curved bench as a connected low block, the thin horizontal water strip, and surrounding vegetation as small distinct blocks, all rendered from a consistent elevated isometric-style viewing angle. The result is a flat two-dimensional raster image with no measured dimensions, no separate CAD layers, no editable 3D geometry, and no reusable 3D scene data.
Step-by-Step Workflow
- 01
Open the Isometric Block Diptych Skill
Navigate directly to the public Skill at /skills/isometric-block-diptych on Imagild. The published workflow is ready to use from the Skill page without any separate technical setup. Once the Skill page loads, you can review the official before-and-after sample to confirm the visual direction matches what you want to create before uploading your own source photograph.
- 02
Upload your architecture source photo and run the transformation
Select a clear, well-lit architecture photograph where the main structure and surrounding key elements are easy to see. Upload the image to the Skill input field, then start the generative transformation. The Skill will process one output using one image credit if you are signed in, and the generated file will be sent to your active session before you choose to keep it.
- 03
Compare, verify, and save your accepted result
Once the generation finishes, place the output side by side with your original photo to check that the spatial hierarchy you care about is preserved. Confirm that all key elements you wanted to retain are visible in block form, and inspect any generated labels or fine details for accuracy. If the result meets your needs, save it to your signed-in Imagild Library for the platform's stated retention period.
Key Pre-Use Decisions
- Choose which core elements you need to preserve before you start
- Before you upload your photo, identify the non-negotiable elements that define your scene's spatial hierarchy, such as the main building, primary stairs, a landmark object like a parked bicycle, a distinct seating element, a water edge, or key planted areas. This helps you quickly evaluate whether the output keeps the relationships between those elements the way you intended after generation.
- Accept that fine details and exact proportions may be simplified for the block style
- This generative Skill is designed to create a cohesive isometric block illusion, not a precise architectural drawing. Small decorative details, subtle material textures, and exact real-world measurements will be simplified into solid connected blocks. If you need photorealistic detail alongside the block aesthetic, you can run a separate related Skill such as photo-to-vector-art later for a complementary stylized version.
- Verify the output and understand its non-CAD, non-3D nature
- The final result is a two-dimensional raster isometric-style illusion, as defined by Adobe's official explanation of isometric art as a flat representation that creates the impression of three dimensions. It does not contain measured dimensions, editable vector geometry, CAD layers, or a reusable 3D scene. If you need a measured architectural plan or production-ready 3D asset, you will still need to create that work separately in dedicated CAD or 3D software.
Official sources checked
Frequently Asked Questions
Can I use this Skill to turn any architecture photo into a usable CAD drawing or editable 3D model?
No. The Isometric Block Diptych Skill generates a two-dimensional raster isometric-style illusion, not a CAD drawing, measured plan, or editable 3D asset. The output has no embedded dimensions, no separate editable geometry layers, and no exportable 3D scene data. It is intended for stylized illustration, concept visualization, social media sharing, or personal creative reference, not for architectural construction or engineering use.
What should I do if a key element from my original photo is missing or placed incorrectly in the generated result?
First, double-check that your source photo shows that element clearly and unobscured in the original shot. You can run the Skill again with the same source image to generate a new independent result, as each run produces one unique output. Manual exposure, contrast, crop, perspective, and export tools in the public /editor workbench do not require a monthly plan; controlled AI object removal requires sign-in and one image credit per completed result.
Do I need an active membership to use the Isometric Block Diptych Skill?
You can browse the public Skill page and view the official before-and-after sample without an account. To run the generative transformation on your own source photo, you need to be signed in to an Imagild account with available image credits. Full access to the photo workbench for post-generation refinements does not require a monthly membership.