Torn-Paper Collage Guide
Make a Torn-Paper Landscape Collage With One Real Photographic Island and Deliberate Negative Space
Most landscape effects cover every pixel edge to edge. This guide walks you through a different approach: keep one irregular patch of your original photograph intact, let adjacent areas shift into dry ink and wash, and leave large stretches of warm blank paper untouched so the scene breathes.
Quick Summary
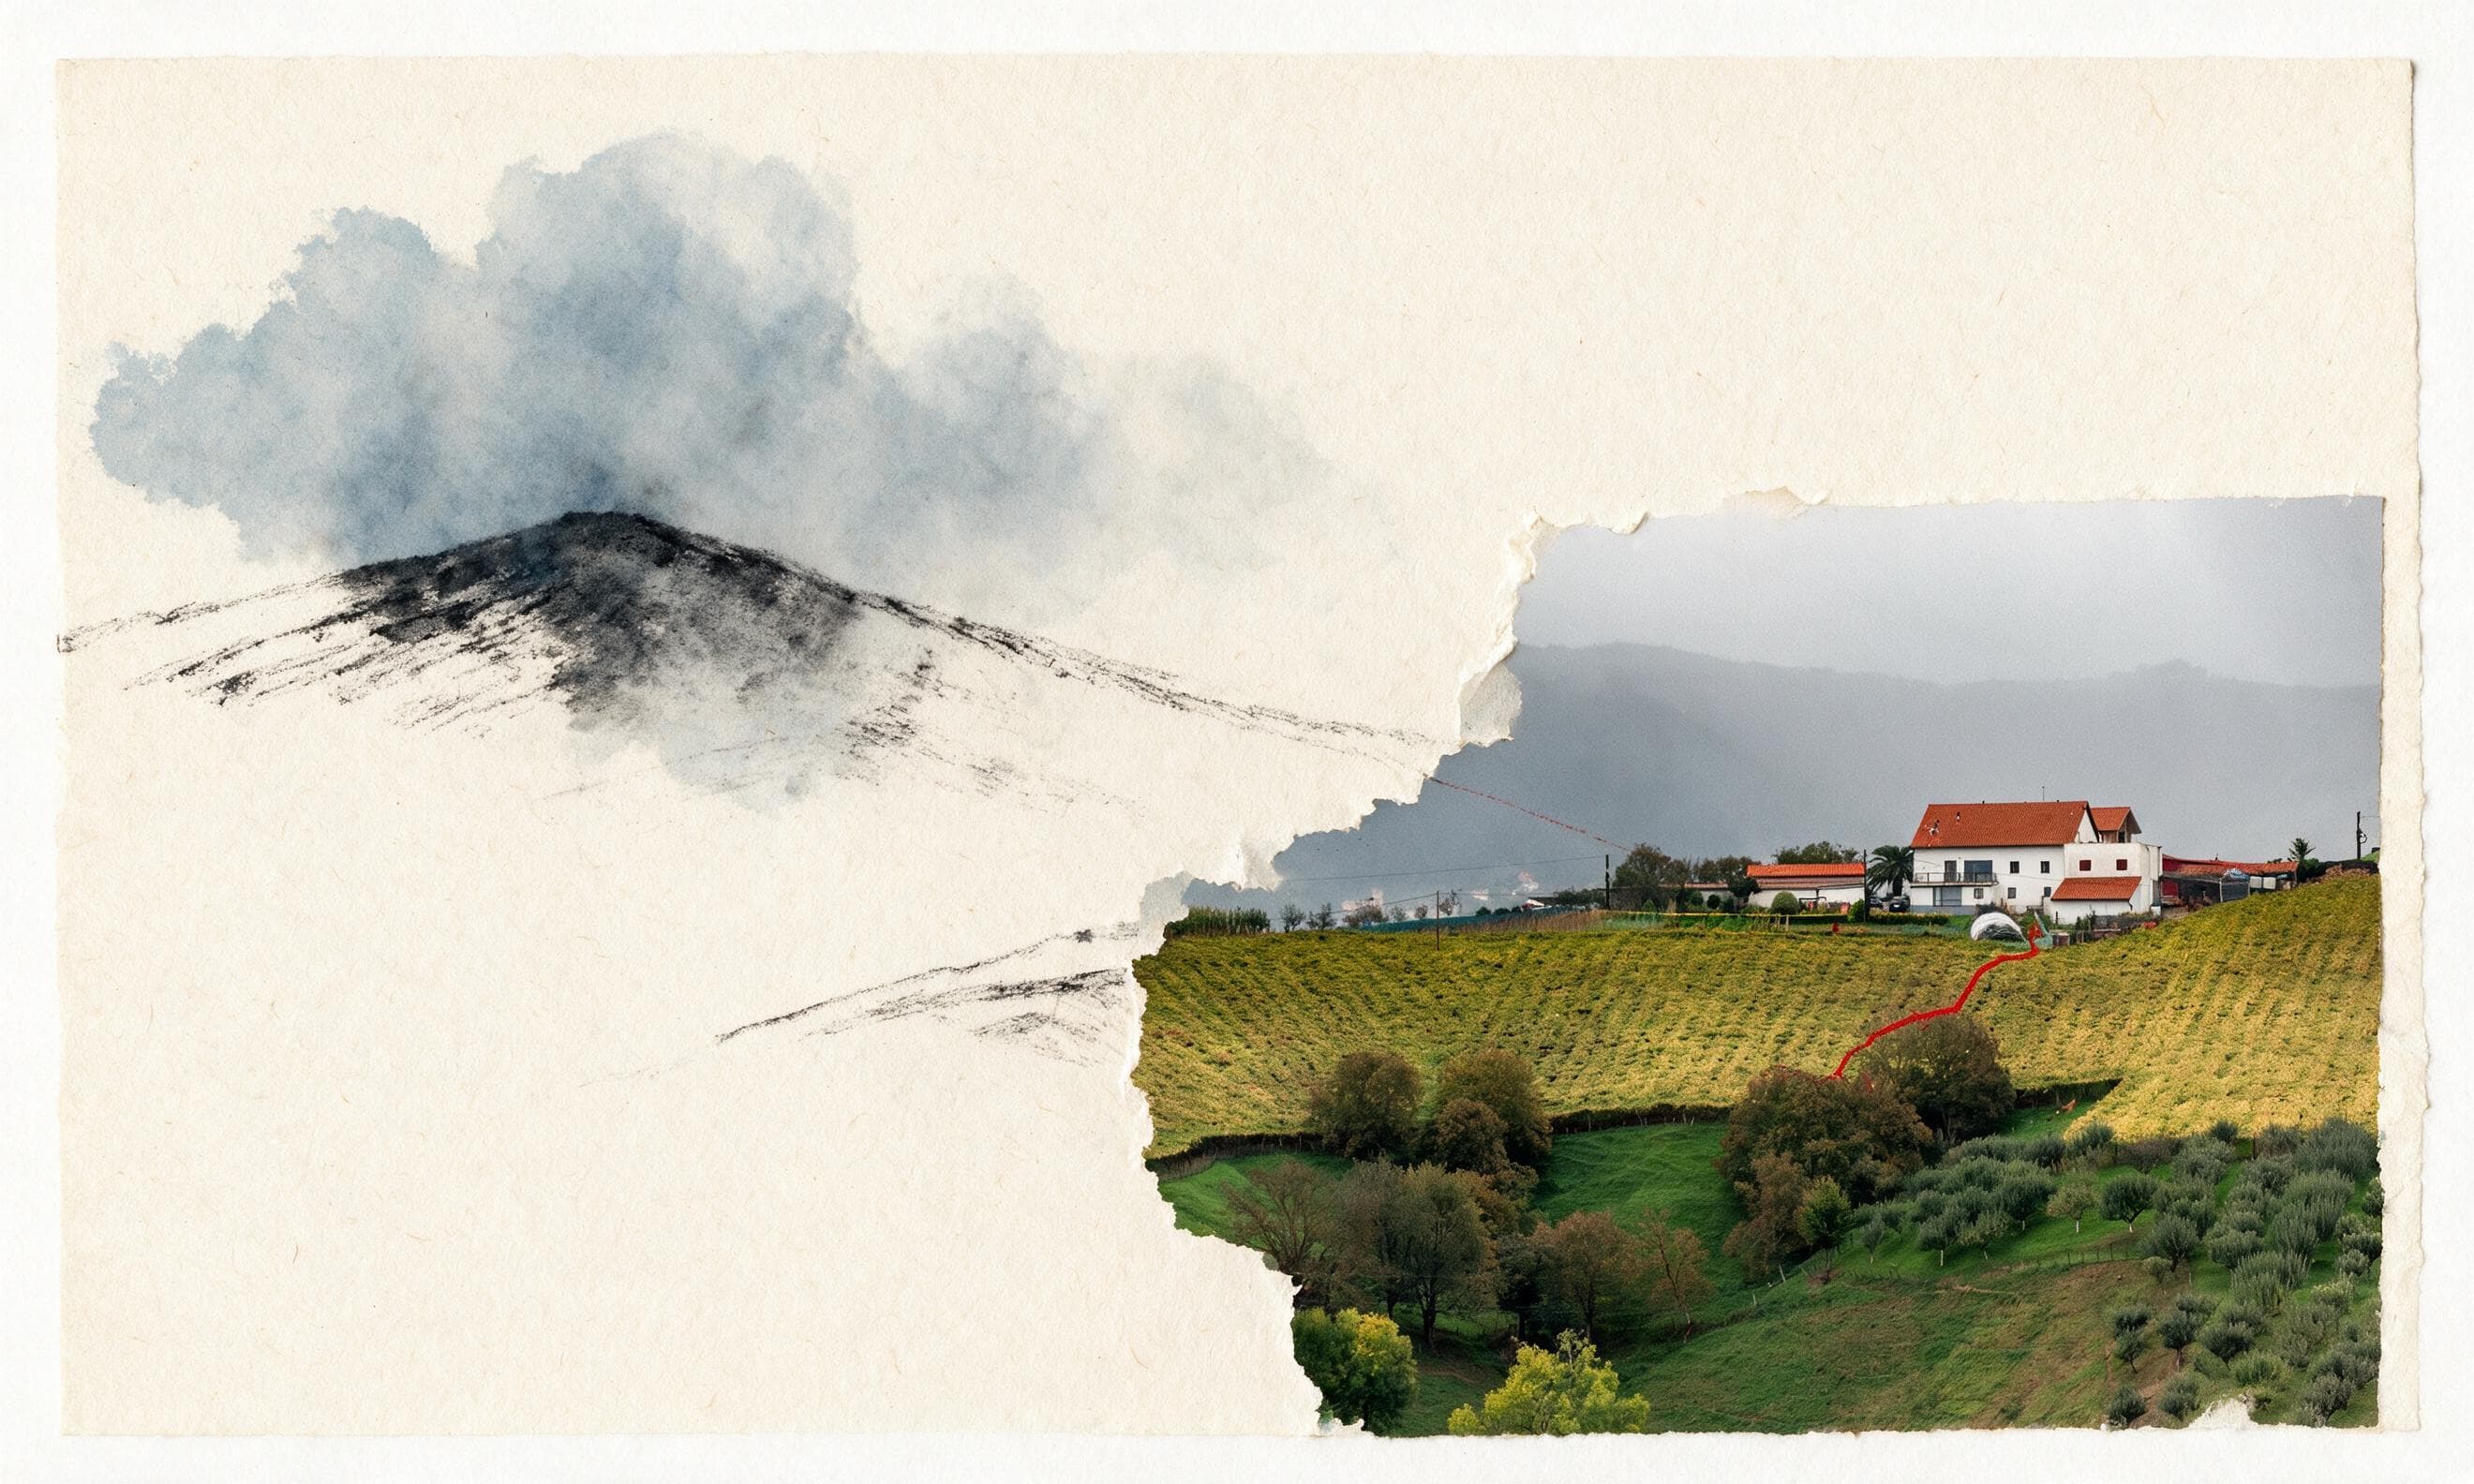
This guide shows you how to use Imagild's Gathered Landscape Skill to turn a full landscape photo into a torn-paper style collage that preserves one distinct photographic island, adds dry ink and a single red route, and keeps intentional negative space as blank paper.
Before-and-After Evidence Check
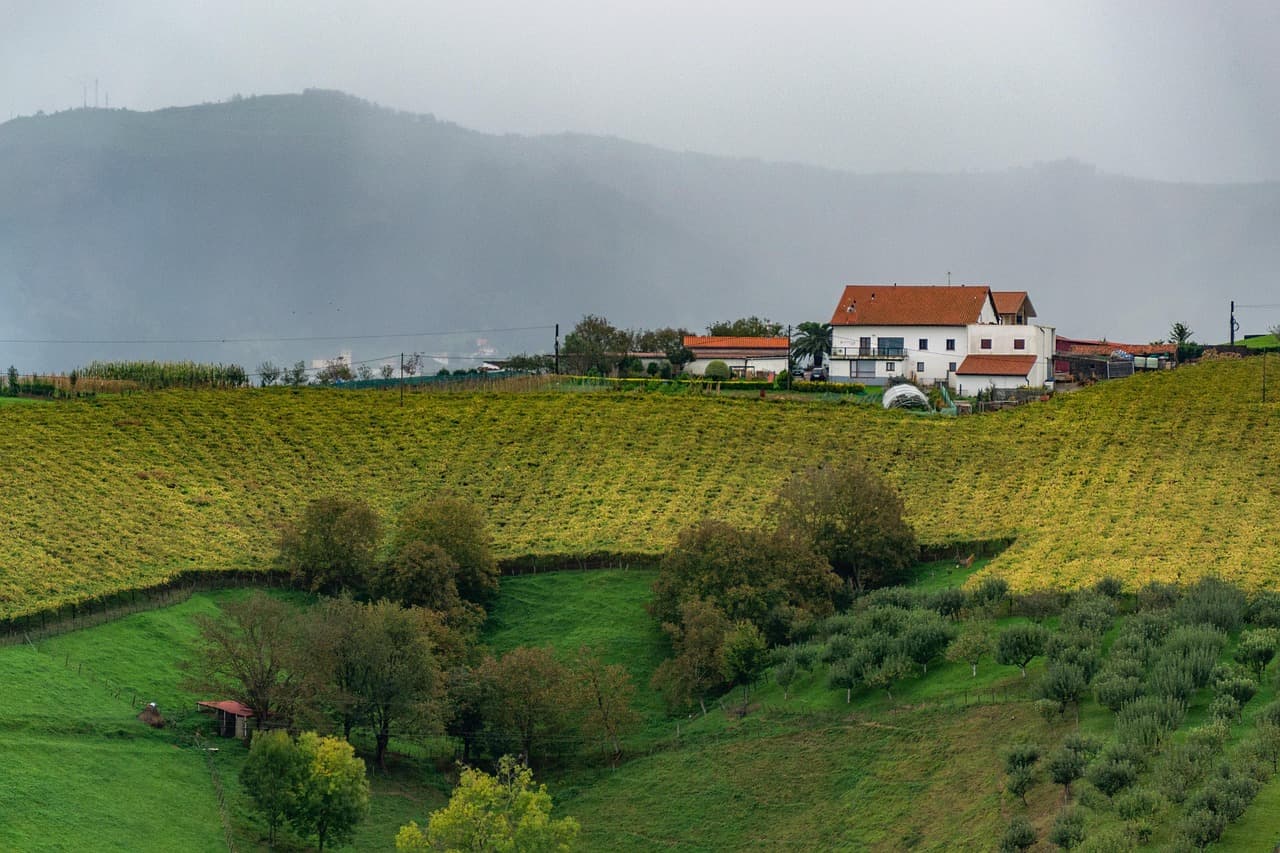
The published source image is a misty rural valley with green and yellow fields, a white red-roof farm near the horizon, scattered trees, and layered gray hills. The published result keeps the farm and fields inside an irregular torn photographic island on the right, converts one source hill into black dry ink and soft gray wash on the left, leaves most of the upper and left canvas as warm blank paper, and adds one thin red line that begins near the farm. No extra factual locations, buildings, or landmarks were added to the final composition, and the scene is never repainted edge to edge.
Step-by-Step Workflow
- 01
Open the Gathered Landscape Skill
Navigate to the public Gathered Landscape Skill at /skills/gathered-landscape-poster in your browser. This is the published Skill path built for this specific collage style, so you can start directly without writing a custom method in the workbench. Take a moment to review the publicly shared before-and-after pair on the Skill page to confirm the visual direction matches what you want to create before you upload any of your own photos.
- 02
Upload your landscape source photo and run the transformation
Choose a landscape photo with a clear focal area, such as the valley and farm visible in the published source. Run the transformation, then compare the result with the source to see which region became the photographic island and how the ink, red line, and blank paper were arranged.
- 03
Review, verify, and save your accepted result
Compare the generated output side by side with your original photo. Check that the photographic island area you wanted to preserve is recognizable, confirm the dry ink and blank paper areas behave as expected, and make sure no unintended details were introduced that break your composition. If you are satisfied with the result, save it to your signed-in Imagild Library where it will be stored for the product's stated retention period.
Key Creative Decisions to Make Before You Start
- Choose which part of your photo will act as the photographic island
- Pick one distinct, self-contained section of your source image that you want to keep as recognizable real photograph content. This could be a cluster of fields around a farm, a small cove with a beach hut, or a grove of trees beside a lake. The rest of the composition will not stay as full photograph, so selecting a clear focal island ensures the final collage still feels rooted in your original memory rather than becoming an abstract illustration.
- Accept that large areas of your source will not remain photographic
- The reviewed result does not keep full-frame photographic coverage: most of the canvas becomes warm blank paper, while smaller areas use a photographic island, dry ink, and soft wash. Decide whether that sample-specific trade-off fits your goal, then inspect how your own result handles each important hill, tree, or field.
- Verify the red line and generated details before finalizing
- The reviewed result includes one red line beginning near the farm. Treat its path, length, and placement as sample-specific. Inspect the full output before saving, especially the photographic-island boundary and fine landscape details; if the composition does not work for your use, run another variation and review it again.
Official sources checked
Frequently Asked Questions
Can I use this Skill to make a torn-paper collage from any landscape photo?
You can use it with most landscape photos that have a clear central subject or distinct focal area. It works best with scenes that have natural depth, such as layered hills, open fields, or coastal views, because the contrast between the preserved photographic island, dry ink elements, and blank paper creates the strongest visual effect. Very busy, tightly cropped photos with no open space may not produce the same quiet, spacious result the reference demonstrates.
Why is most of the canvas left as blank paper instead of being filled with illustration or paint?
This style is built around deliberate negative space, a choice drawn from collage storytelling practices referenced in the Collaposer CHI 2026 paper on photo cutouts. Leaving large areas of the canvas as blank warm paper keeps the focus on your preserved photographic island, gives the composition a calm, handmade quality, and prevents the collage from feeling cluttered or overcrowded the way a fully repainted poster often does.
What should I do if my result does not look like the published reference example?
First, check that your source photo has a distinct focal area that can naturally become a photographic island. If your original image is too flat, too dark, or lacks clear separation between foreground and background, the transformation may not land in the same visual territory. You can try uploading a different source photo, or running the transformation again with the same image to get a new variation. Remember that this is a generative Skill, not a deterministic filter, so results will vary between different source images and different runs.