Postcard Creation
Turn a Coastal Landscape Photo Into a Restrained Postcard Layout
This step-by-step guide walks you through using the Postcard Notes Skill to frame your coastal landscape photo in a soft warm-paper border, then covers the non-generative production checks required to get your finished piece ready for physical printing or postal delivery.
Quick Answer
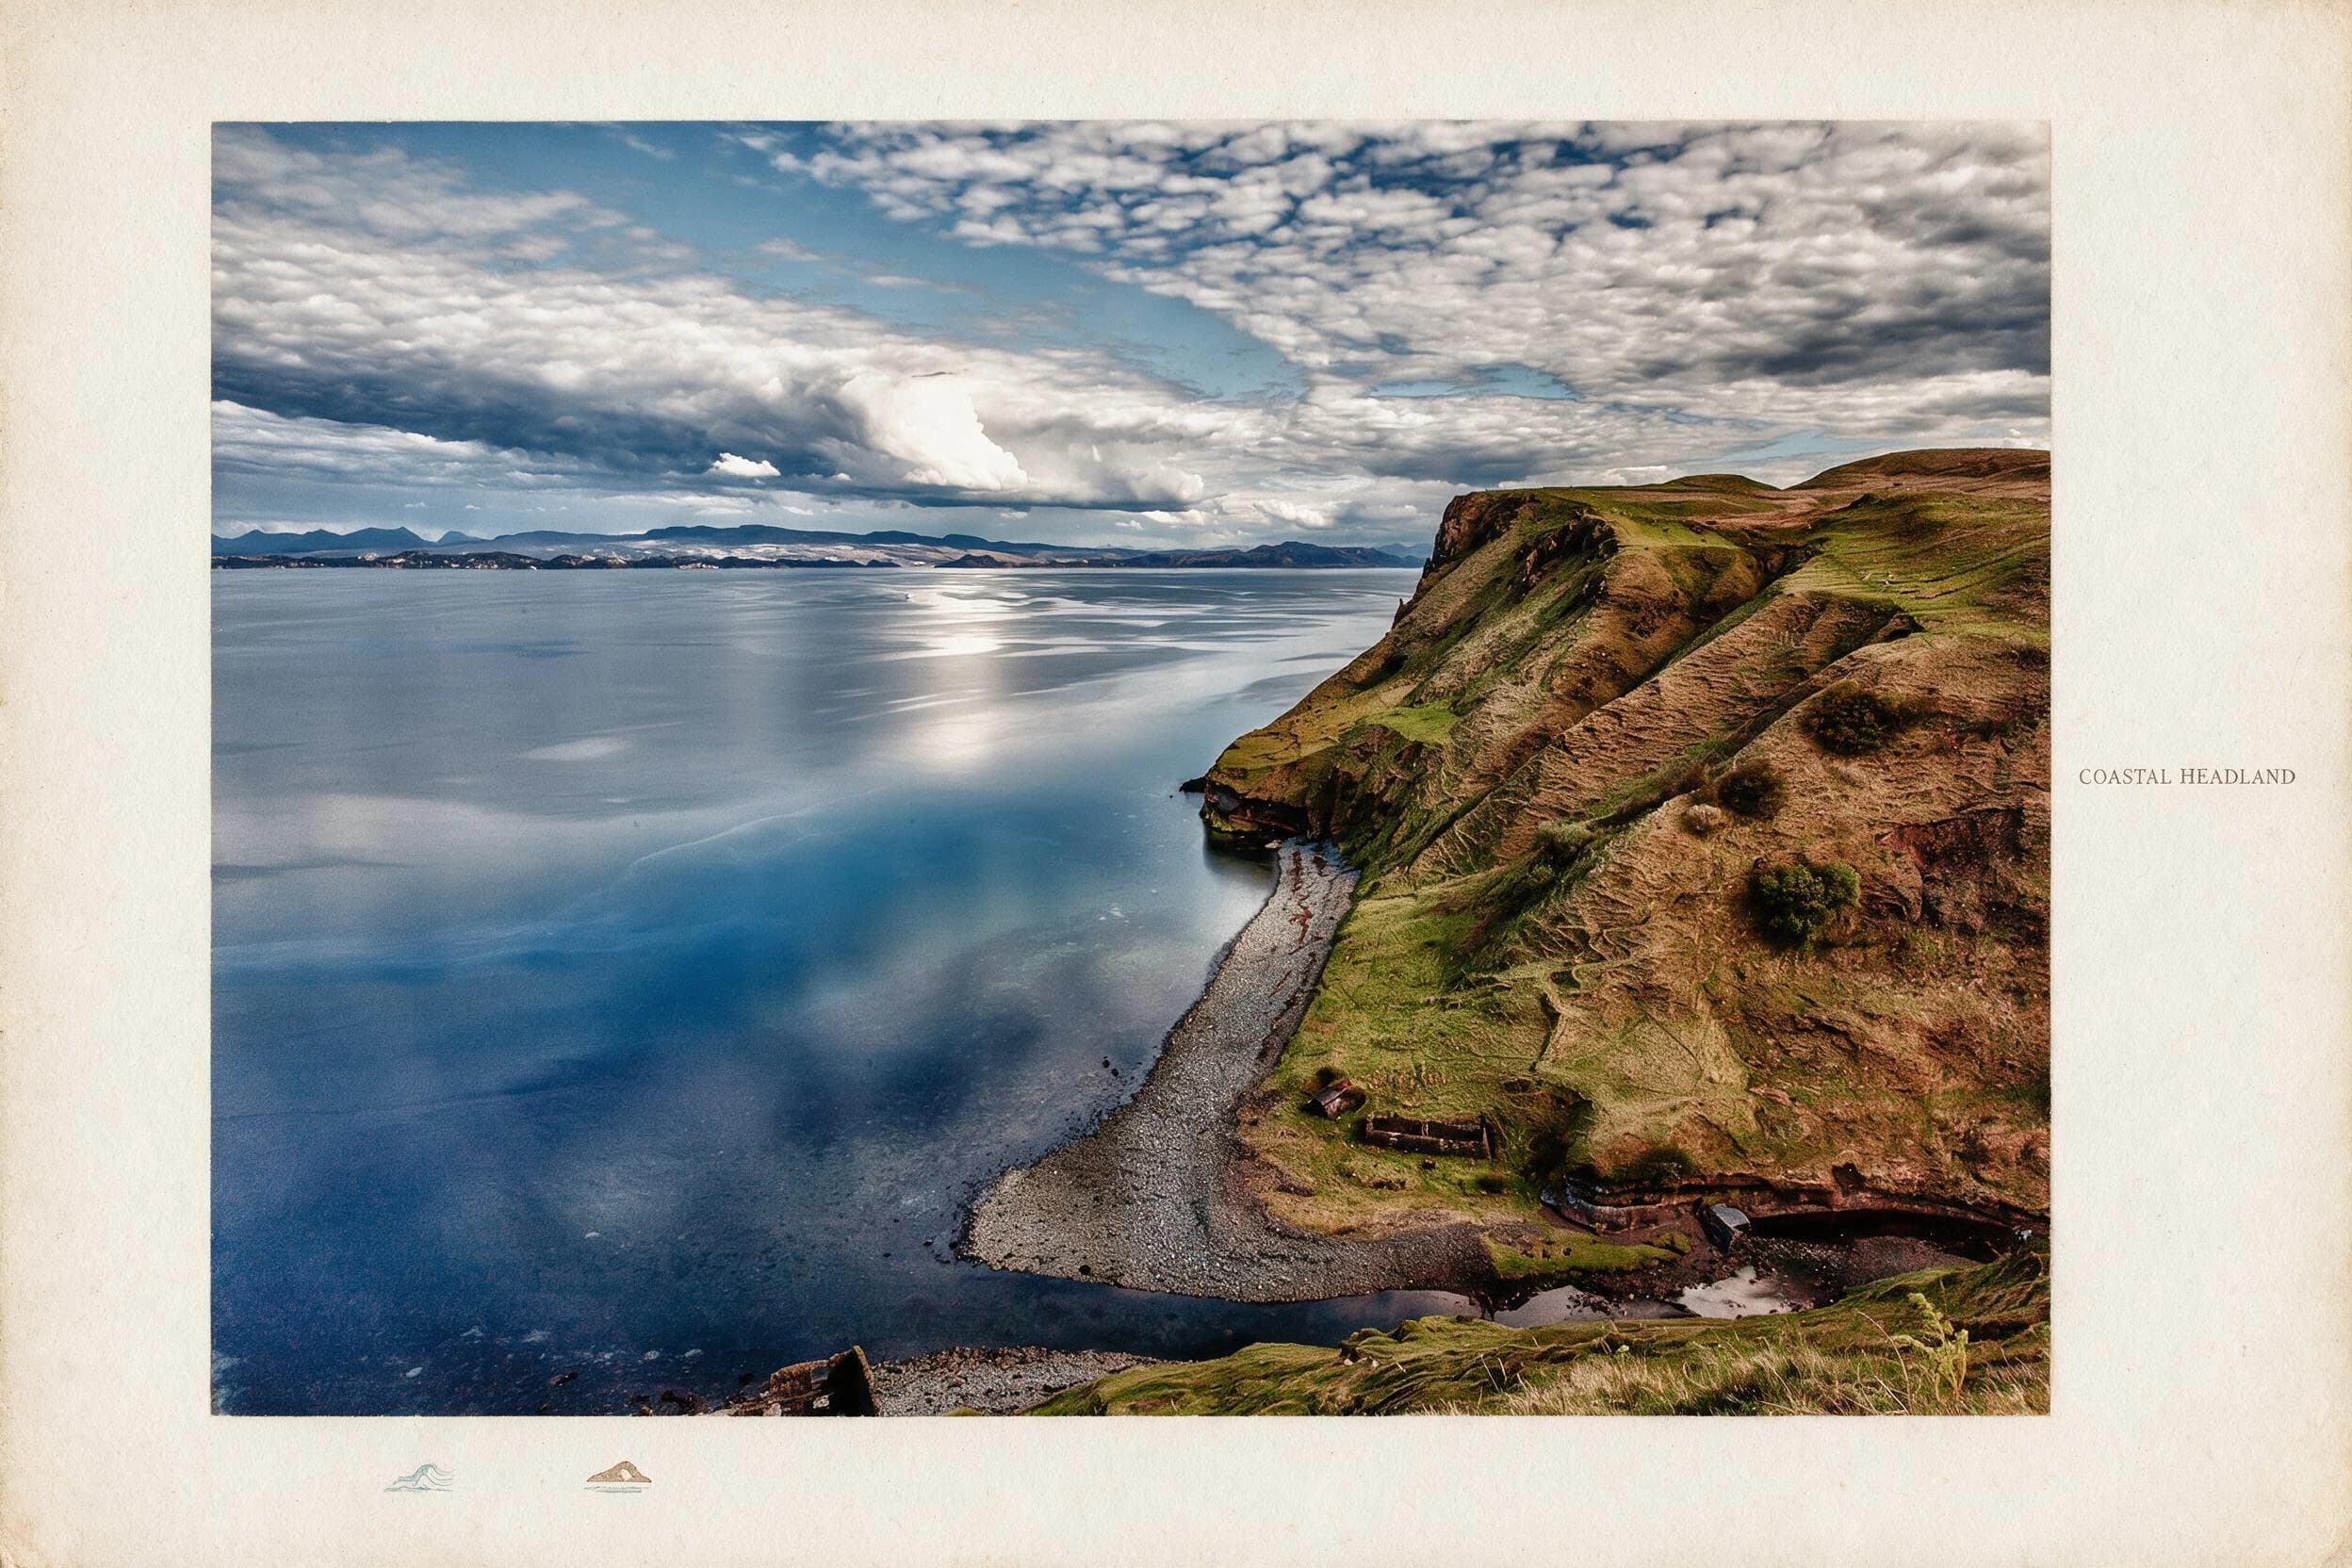
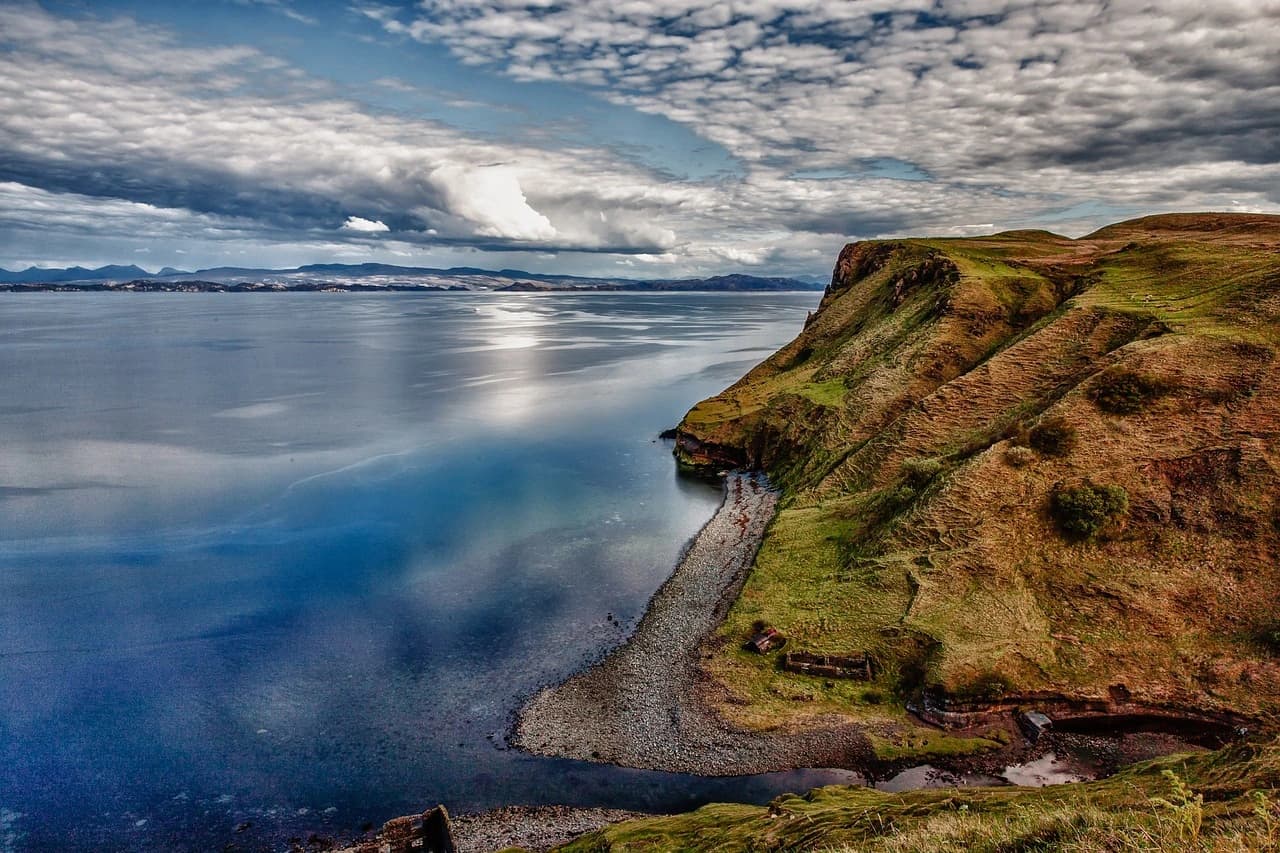
This guide shows you how to run the Postcard Notes Skill on your coastal photo to generate a restrained postcard front, then walks through the required manual checks for text accuracy, print specs, and postal rules before mailing. In the reviewed before-and-after pair, the source is a wide coastal landscape with blue water on the left, a steep brown-green headland on the right, a curving shoreline, distant mountains, and layered clouds.
Before and After: Verified Sample Pair
The original source image is a wide coastal landscape with bright blue water on the left, a steep brown-green headland on the right, a gently curving shoreline, hazy distant mountains, and soft layered clouds across the upper sky. The reviewed generated result keeps the full original coastal photograph completely visible inside a wide, matte warm-paper border, adds a small centered uppercase label that reads COASTAL HEADLAND to the right of the landscape, and places two thin short horizontal line marks directly below the bottom edge of the photo. No part of the original landscape is cropped, altered, or obscured by the Skill's default output. This generated piece only shows a styled postcard front; it does not include a formatted mailing back, verified address zones, stamp placement guides, or printer-ready bleed margins.
Step-by-Step Workflow
- 01
Open the Postcard Notes Skill in Imagild Studio
Navigate directly to the public Skill path at /skills/postcard-notes from your browser. You do not need to install any extra software or download third-party assets to access the published workflow. Once the Skill loads, you will see the official before-and-after sample pair displayed at the top of the page so you can confirm the expected visual direction before you upload your own source photo. If you are signed into your Imagild account, you can also save this Skill to your personal favorites list to access it quickly for future travel photo projects.
- 02
Upload your coastal landscape source photo and run the transformation
Select the coastal landscape photo you want to turn into a postcard and upload it to the Skill interface. Make sure your source image is the full, uncropped version of your coastal shot so the Skill can frame the entire scene inside the warm-paper border without cutting off key details like the shoreline or distant mountains. Start the generative transformation and wait for the system to generate your first candidate. Each generation uses one image credit if you are on a paid plan, and the finished result will appear in your signed-in Library automatically once processing is complete.
- 03
Review your generated output and save your accepted version
Compare your generated postcard front side by side with your original source photo to confirm the full landscape is preserved and the warm-paper border, location label, and small line marks appear as expected. If you do not like the first result, you can run the Skill again to generate a new candidate, keeping in mind that each new generation will consume one additional image credit. Once you are satisfied with the layout, save the final version to your Library, then export it at the size and quality level that matches your intended use, whether that is digital sharing or local printing.
Key Decisions Before You Finalize Your Postcard
- Choose which parts of your original photo you want to preserve
- The reviewed Postcard Notes sample keeps the full original landscape intact, but you should decide before you run the transformation whether your source photo needs a tighter composition around a specific section of the coast, such as the headland or the curving shoreline. If it does, crop a copy in an image editor before providing it to the Skill, while keeping the uncropped original. Then compare the generated result with both versions to confirm that the detail you want to emphasize still has enough space around it.
- Verify that any generated location text is accurate to your real location
- The sample output includes the label COASTAL HEADLAND, but generated wording for another photo may not match the real place you visited. Generated lettering is not fact-checked automatically, so read every visible word before printing or sharing. If a label is incorrect, do not treat it as a factual location record; correct it in a layout editor you trust or keep the result as a visual concept only.
- Confirm you understand the Skill's production limitations before printing
- The Postcard Notes Skill only generates a styled postcard front. It does not create a formatted back side with address lines, stamp placement, or a dividing line for messages, and it does not add printer-specific bleed margins or adjust pixel density to match commercial print requirements. It also does not guarantee that the final output will meet current postal service size and thickness rules. You will need to handle all of these production steps separately, using the official Adobe InDesign postcard setup guide and USPS mailability guidance linked from the Skill page to make sure your physical postcard is ready to send.
Official sources checked
Frequently Asked Questions
Can I use the Postcard Notes Skill on non-coastal photos, like a mountain town or lake shot?
The published sample pair uses a coastal landscape, but you can upload any of your own travel or landscape photos to the Skill to test how it renders the warm-paper border, small label, and line mark layout. Keep in mind that the visual balance of the border and text may look different on a vertical portrait-oriented photo or a tightly cropped urban shot, so you should generate a test candidate first to see if the restrained postcard style works well for your specific image before you commit to printing a full version.
Do I need a paid membership to use the Postcard Notes Skill?
You can view the public Skill page and the official before-and-after sample pair without an account or paid membership. To run the generative transformation on your own source photo and save results to your Library, you will need an active Imagild account and enough available image credits. Access to the full photo workbench, where you can make manual adjustments like custom cropping, exposure tweaks, or text edits to your finished postcard, does not require a monthly membership.
What should I do if my printed postcard gets rejected by the post office?
First, confirm you reviewed the official USPS postcard size and mailability guidance before you sent your file to print. Common issues that cause rejection include using dimensions outside the allowed postcard size range, not leaving enough blank space for the address and stamp on the back, or using a paper thickness that does not meet postal standards. The Postcard Notes Skill does not generate a compliant mailing back, so you will need to add that layout separately in a design tool like Adobe InDesign using the official setup guide to make sure your final physical piece follows all current postal rules.