Memory Cut Collage Guide
Restrained Layered Collage With Memory Cut: No Duplicated Subjects
This step-by-step guide shows how to turn one full landscape photograph into a restrained layered collage using broad horizontal bands, narrow light seams, and gentle offsets, without duplicating your main subject or adding unrelated decorative elements.
Quick Answer
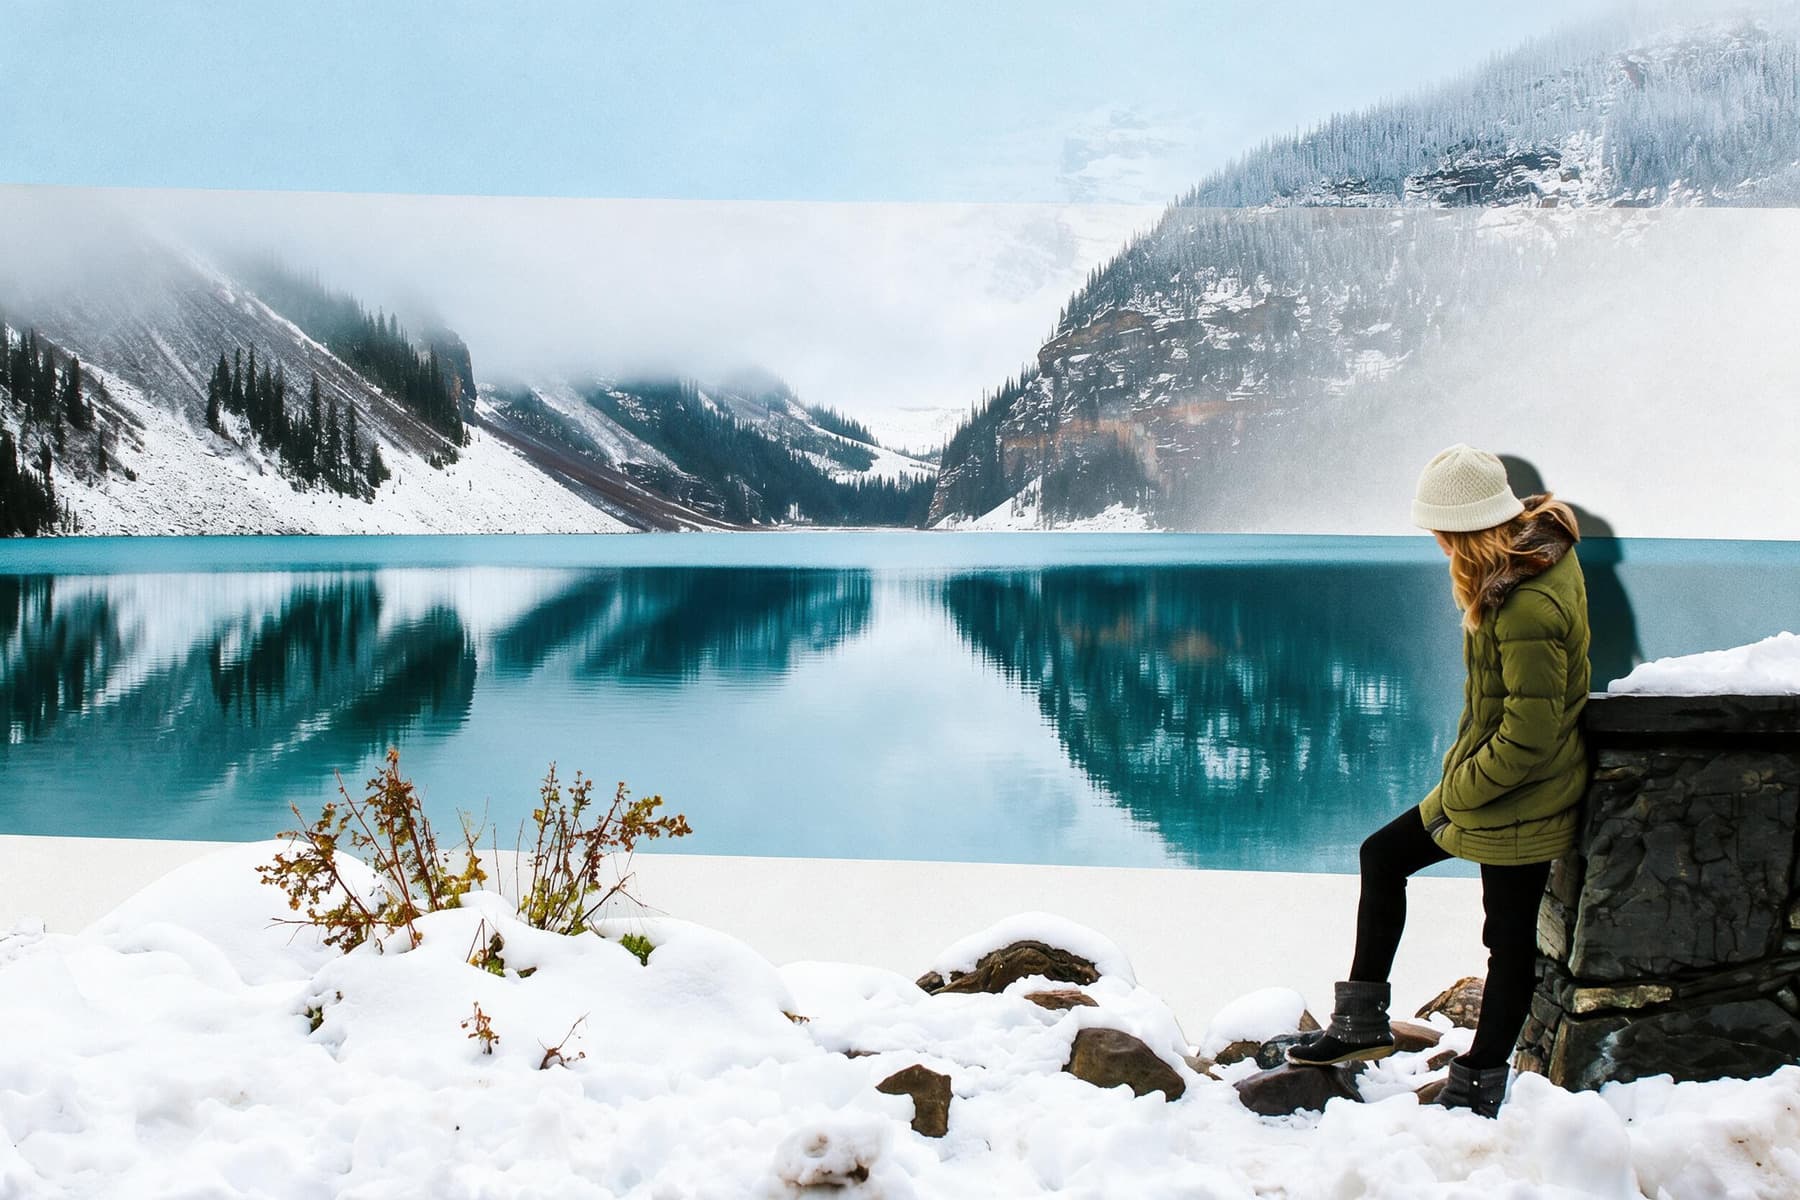
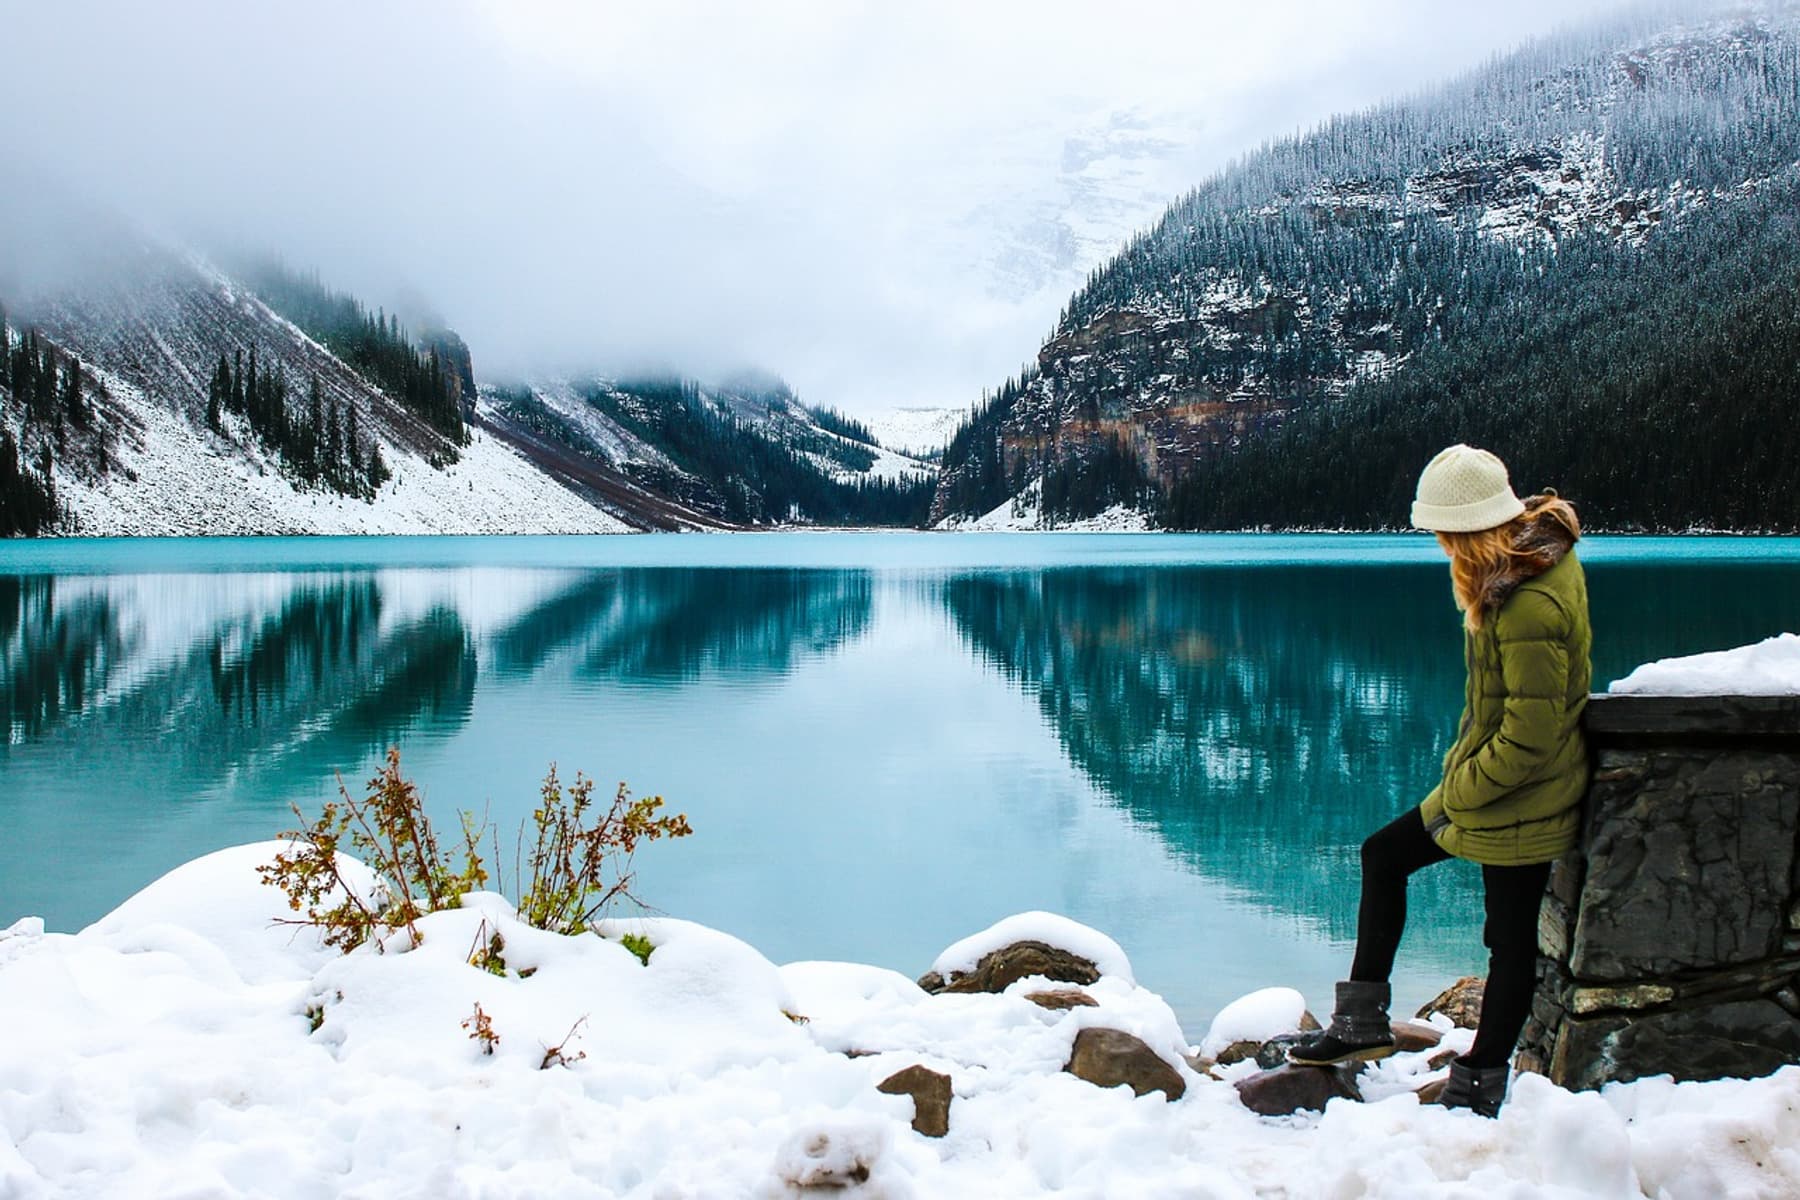
Memory Cut turns one source photo into a restrained banded collage by dividing the frame into a few broad horizontal layers, keeping core subject relationships intact and avoiding duplicated people or unplanned added objects. In the reviewed before-and-after pair, the source is a snowy mountain lake with one person at the far right, turquoise water across the center, and fog between two dark mountain slopes.
Reviewed Before-and-After Evidence
The reviewed source image is a snowy mountain lake scene with one person positioned at the far right, turquoise water spanning the center of the frame, and soft fog sitting between two dark mountain slopes. The corresponding result keeps that single person continuous across the composition, retains the original mountain-lake-snow spatial relationships, and restructures the photograph into a small set of broad horizontal bands separated by narrow light seams with slight positional offsets. The central water band stays strongly photographic, no second person or unrelated object appears, and the final output contains no added title, date, quote, or decorative icon.
Step-by-Step Workflow
- 01
Open the Memory Cut Skill
Open the public Memory Cut Skill at /skills/memory-cut, review the published before-and-after pair, then supply your source photo when you are ready to test the transformation.
- 02
Provide your single source photograph
Upload one full landscape photo that includes the subjects and spatial relationships you want to carry through to the final collage. For best results, choose an image with clear horizontal zones such as a foreground shoreline, midground water, and background mountains, since the Skill works with broad horizontal structure from your original shot.
- 03
Run the transformation and review your output
Start the generative transformation, then wait for the result to load. Compare the new output side by side with your original photo to confirm it matches the restrained layered style you intended, before you save an accepted version to your signed-in Imagild Library.
Key Decisions Before You Start
- Choose which core elements you want to preserve
- Before you upload, identify the specific subjects and spatial relationships that matter most in your photo, such as a person standing at the lake edge, the horizon line, and the color of the water. This gives you a clear checklist to run through once your result is ready, so you can confirm those elements are positioned the way you expected.
- Note what may shift in the generated output
- The generative process introduces slight positional offsets between the broad horizontal bands and adds narrow light seams that were not present in your original photo. These changes are the core of the restrained collage effect, but you should verify that they do not obscure any fine details you wanted to keep visible.
- Complete a post-generation verification pass
- After your result loads, check for any unplanned additions such as extra people, unrelated objects, or inserted text that do not align with the restrained collage style. The reviewed sample output did not include these elements, but every new source photo can produce different results, so this quick check helps you confirm your final image is ready to use.
Official sources checked
Frequently Asked Questions
Can I use Memory Cut on a photo that does not have a clear horizontal landscape structure?
Yes, you can upload any single photo to the Skill, but the restrained layered banded effect is easiest to recognize and align with the original scene when your source already has distinct horizontal zones. Photos with tightly framed vertical subjects or busy overlapping foreground elements may produce results that feel less consistent with the sample mountain lake output.
Where does the Memory Cut transformation save my finished image?
Once you review your generated result and confirm you want to keep it, you can save it directly to your signed-in Imagild Library. All saved outputs follow the product's stated retention period, so you can return to access your work later without exporting it immediately after generation.
What should I compare after the layered result is generated?
Compare the source and result for subject count, the person's position, the lake and mountain relationships, band boundaries, unexpected duplication, and any added lettering. Those checks matter more than assuming every run will match the sample.