Doodle Story Diptych Guide
Turn a Street Still Life Into a Photo-and-Doodle Diptych
This step-by-step walkthrough shows how to separate the real, traceable elements of your street still life from playful, generated line art and handwritten storytelling, so you never mistake creative additions for documentary fact.
At a Glance
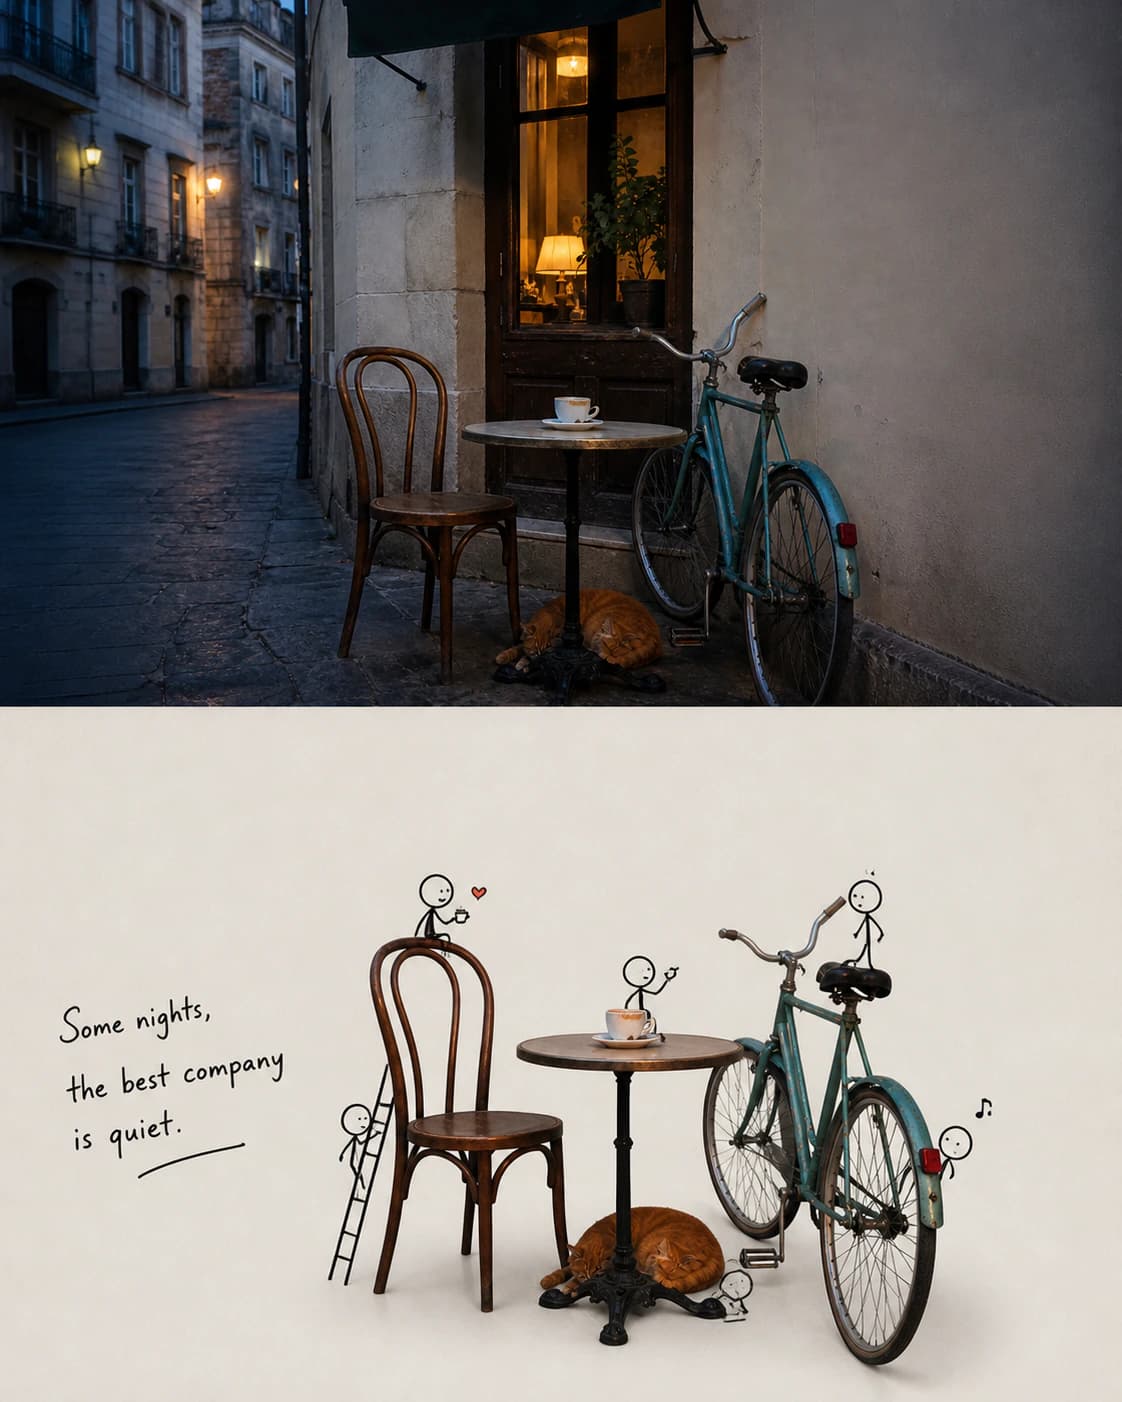
This guide walks you through using the Doodle Story Diptych Skill to turn your street still life into a two-part layout that keeps your original photo intact and adds a doodled lower panel with recognizable anchors and gentle narrative details.
What We Verified: Before and After
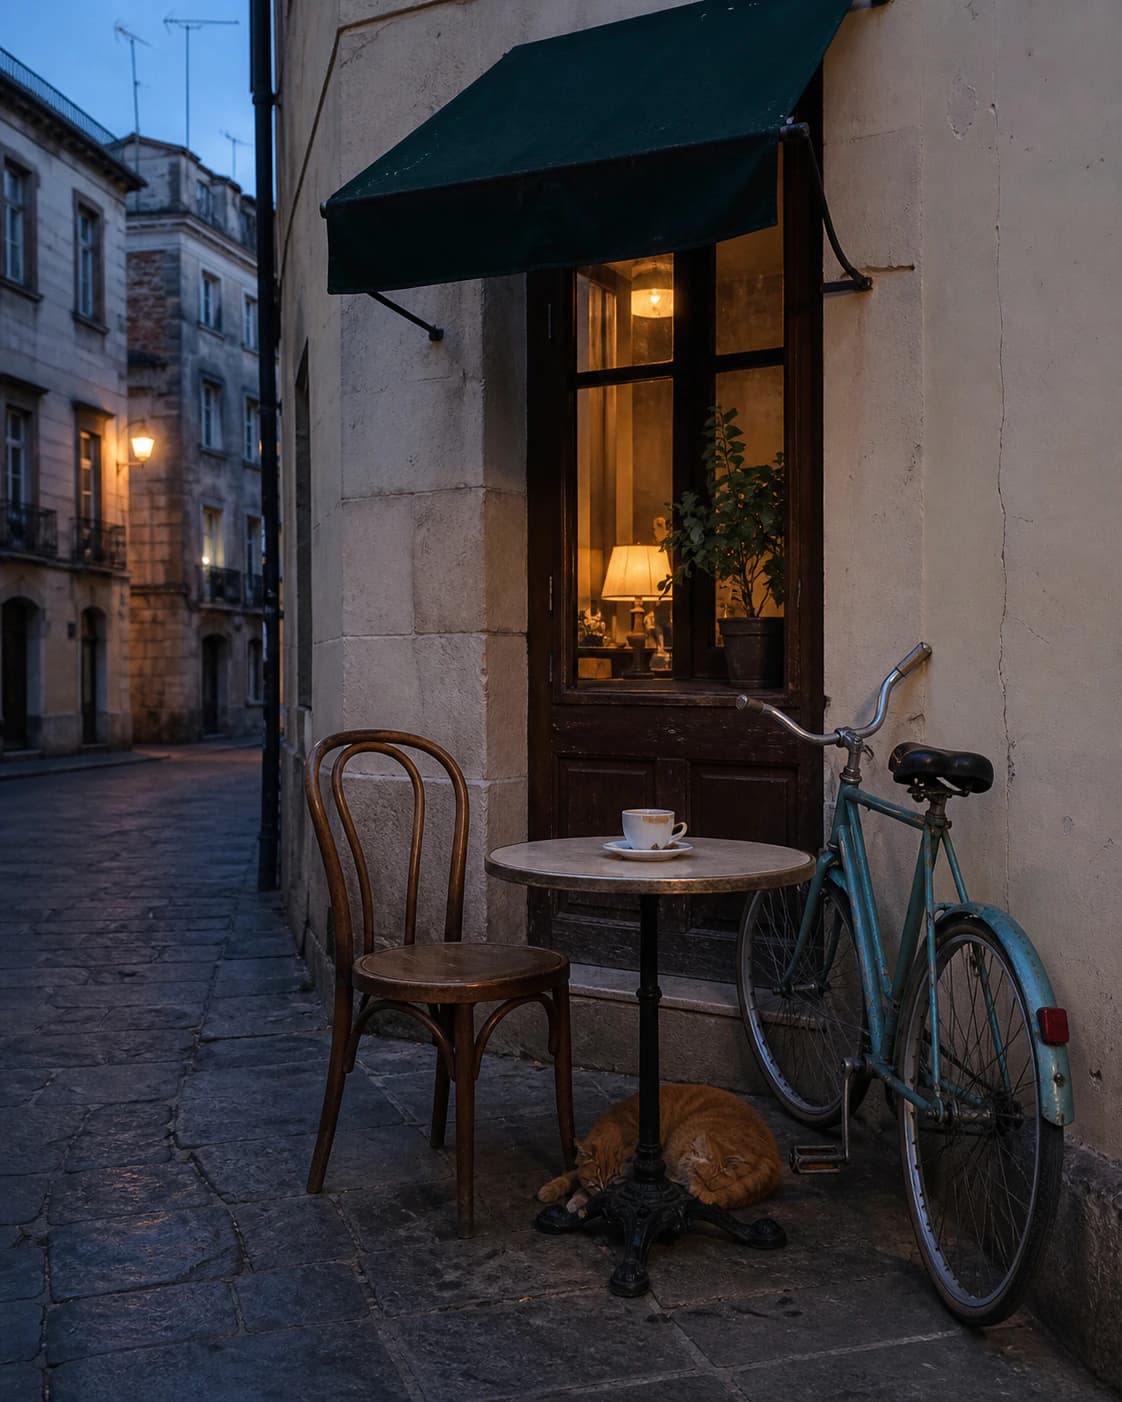
The reviewed dusk source photograph contains a cafe chair, round small table, one drinking cup, two resting orange cats, a parked bicycle, textured pavement, and soft warm light spilling from a nearby storefront. The published diptych result keeps the full unaltered source photo in the upper half of the frame. In the lower half, the same chair, table, cup, two orange cats, and bicycle appear as distinct, cutout-like recognizable anchors surrounded by spare black line drawing. Tiny drawn human figures and a handwritten sentence about quiet company are new, generated editorial additions that do not appear anywhere in the original source photo.
Step-by-Step Workflow
- 01
Open the Doodle Story Diptych Skill
Navigate directly to the public Skill at /skills/doodle-story-diptych from your Imagild browser session. You do not need to configure extra hidden settings or edit layers manually to start. Confirm you are signed in so your finished result can save to your personal Library once you accept it.
- 02
Upload your street still life source photo
Select the dusk or daytime street still life you want to transform. For best results, pick a shot where your key physical elements — such as chairs, tables, pets, and nearby objects — are clearly visible and not heavily obscured by motion blur or deep shadow. The Skill is designed to work from a single input photograph, so you do not need to combine multiple files before you begin.
- 03
Run the Skill and review your output
Start the generative transformation and wait for your diptych to render. Once it appears, compare the lower panel to your original photo to confirm the anchors you care about are still recognizable. If you are satisfied, save the accepted result to your Library. If you want to refine the base photo first before rerunning the Skill, you can export a polished version from the /editor workbench using your active membership access.
Key Creative Decisions to Make Before You Run
- Choose which real anchors you want to stay recognizable
- Decide ahead of time which elements in your source photo matter most as traceable, real-world markers. For this sample, the user prioritized the cafe chair, table, cup, two orange cats, and bicycle, so each of these items is easy to identify in the doodled lower panel. If you have a different set of meaningful objects in your shot, keep those in mind as you review the output to make sure none of them are lost in the line-art treatment.
- Decide how much editorial storytelling fits your intended use
- The generated tiny line figures and handwritten narrative are creative additions, not factual records of what was present when you took the photo. If you plan to share the diptych on social media, as a personal keepsake, or in a small creative project, you can decide whether the generated tone matches the mood you want. You should never treat the handwritten sentence or drawn people as a literal account of the moment you photographed.
- Plan to verify all generated text and fine details manually
- Generated handwritten lettering can sometimes contain small inconsistencies or wording that does not match your exact intent. Before you export or share the final file, read the narrative line closely and inspect the tiny drawn figures to confirm they do not include any unexpected details. If the text is not what you hoped for, you can adjust your source photo in the photo workbench and run the Skill again to get a new variation to review.
Official sources checked
Frequently Asked Questions
Can I use this Skill on any casual street photo, or does it need to be a still life with specific objects?
The Skill works with everyday street scenes that have distinct, stationary subjects. The published sample uses a cafe-side still life with a chair, table, cup, two orange cats, and bicycle, but you can upload other street stills as long as your key subjects are not heavily blurred or blocked by foreground clutter. Results will vary based on what appears in your original input.
Do I need an active membership to use the Doodle Story Diptych Skill?
You can browse the public Skill and view the official before-and-after sample without a membership. To run the Skill with your own source photo and save your finished output to your Library, you need an active Imagild account. Access to the separate photo workbench at /editor for pre-render adjustments does not require a monthly membership.
What should I do if one of my key anchors is hard to recognize in the lower doodle panel?
First, compare the diptych output directly to your original photo to see which element lost definition. You can reupload a slightly cropped or brighter version of your source photo that keeps that key object more prominent, then run the Skill again. You can use the photo workbench to gently boost sharpness or reduce shadow over that specific area before you export the adjusted source and feed it back into the Skill.